

 MCP
MCP A2A
A2AGenerate a Weights & Biases API key
A Weights & Biases API key authenticates requests against the W&B GraphQL Public API on behalf of your account. The key inherits the full permissions of the user who mints it — W&B keys have no scopes, permission picker, or expiration.
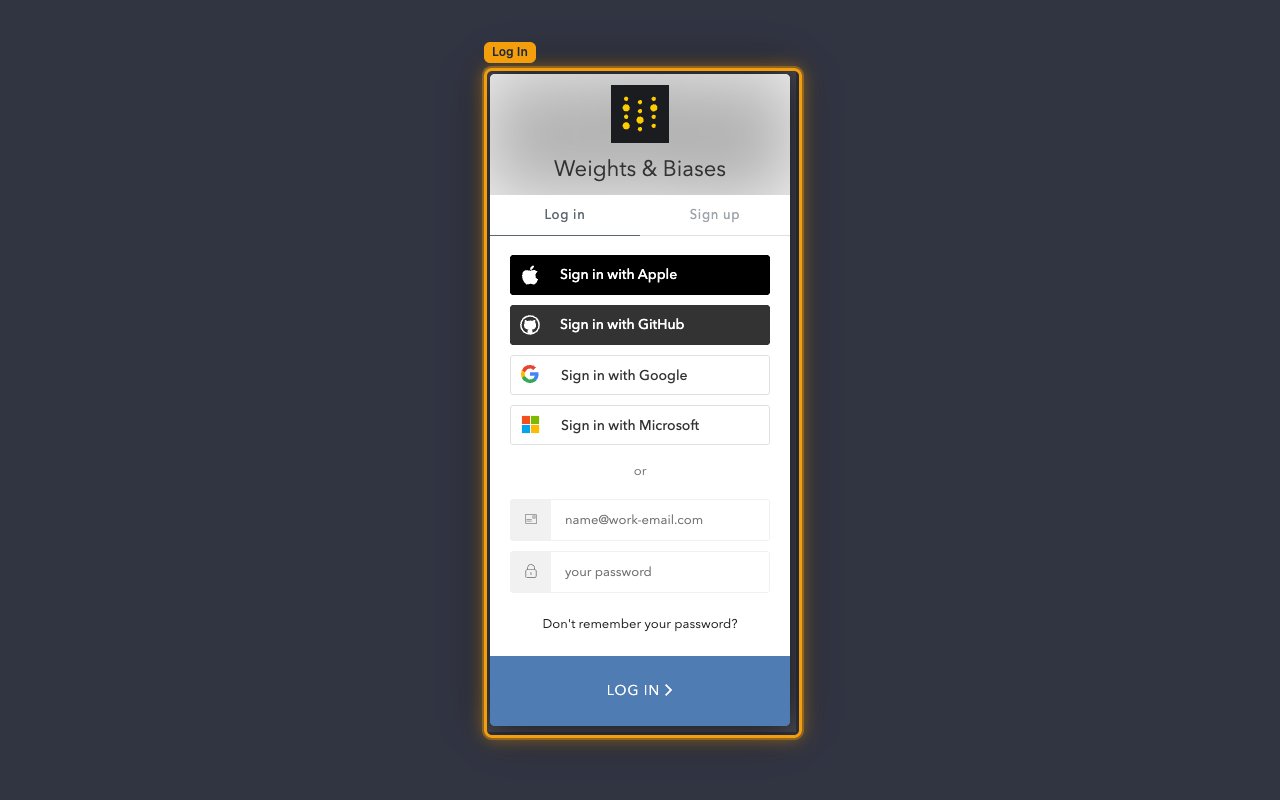
Sign in to Weights & Biases
Go to the W&B sign-in page and complete Log In. You can sign in with Sign in with Apple, Sign in with GitHub, Sign in with Google, Sign in with Microsoft, or with your email and password using the Email and Password fields.
- Don’t have an account? Use the Sign up tab on the same screen, or open app.wandb.ai/login?signup=true.
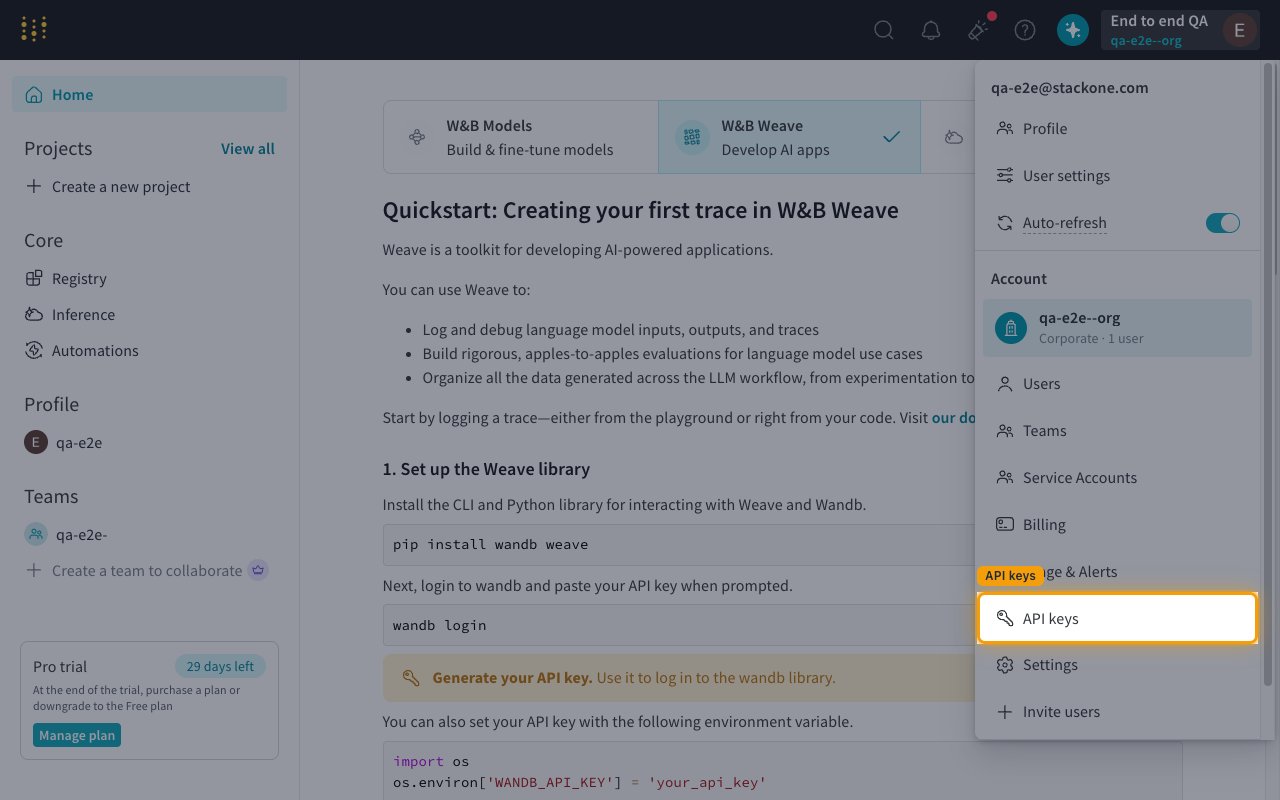
Open API keys from the avatar menu
Once signed in, click your profile avatar in the top-right corner to open the Toggle profile & account menu, then click API keys in the Account section of the dropdown. This lands you on the API keys panel of User settings (https://wandb.ai/settings#apikeys) where every key on your account is listed.
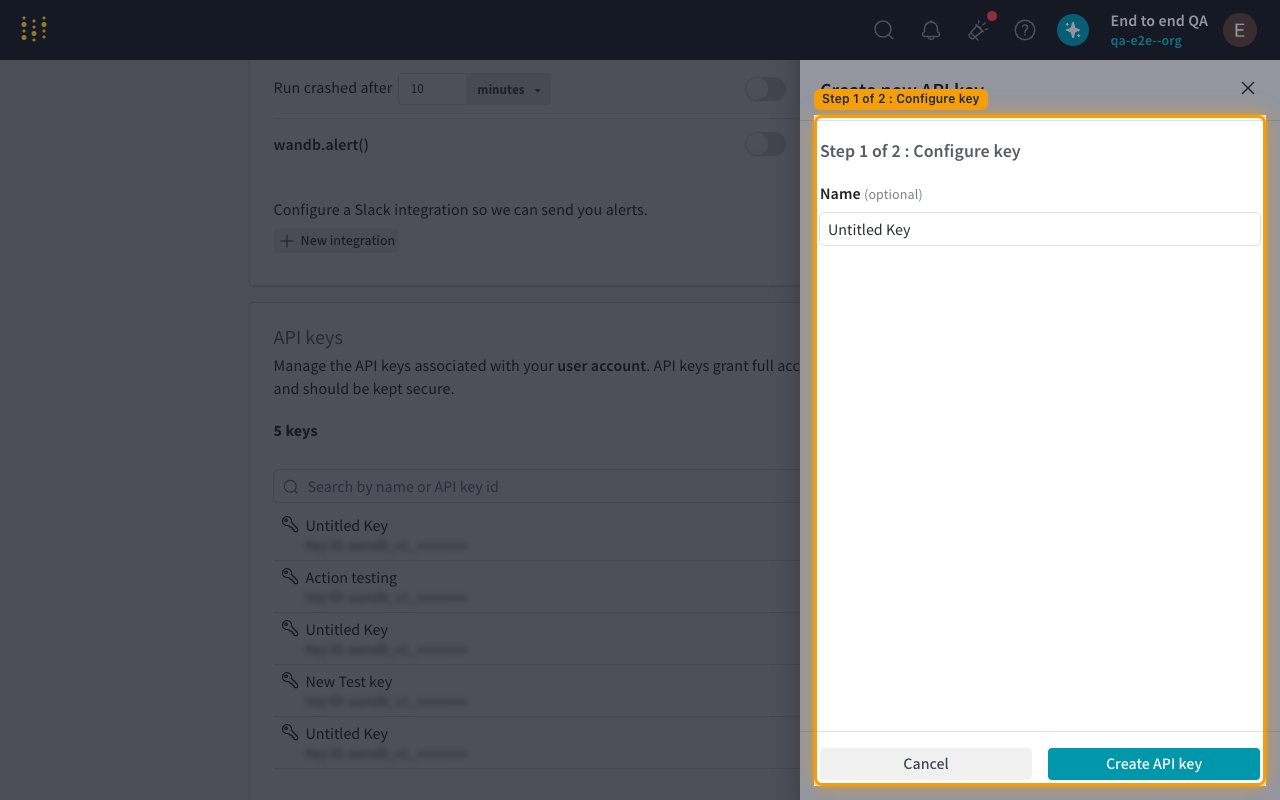
Create a new API key
In the API keys panel click + New key to open the Create new API key dialog. On Step 1 of 2 : Configure key, optionally enter a value in the Name (optional) field (the default is Untitled Key), then click Create API key to advance to Step 2.
- Choose a descriptive name — the name appears in the API keys list so you can identify which key is used by StackOne when it’s time to rotate or revoke it.
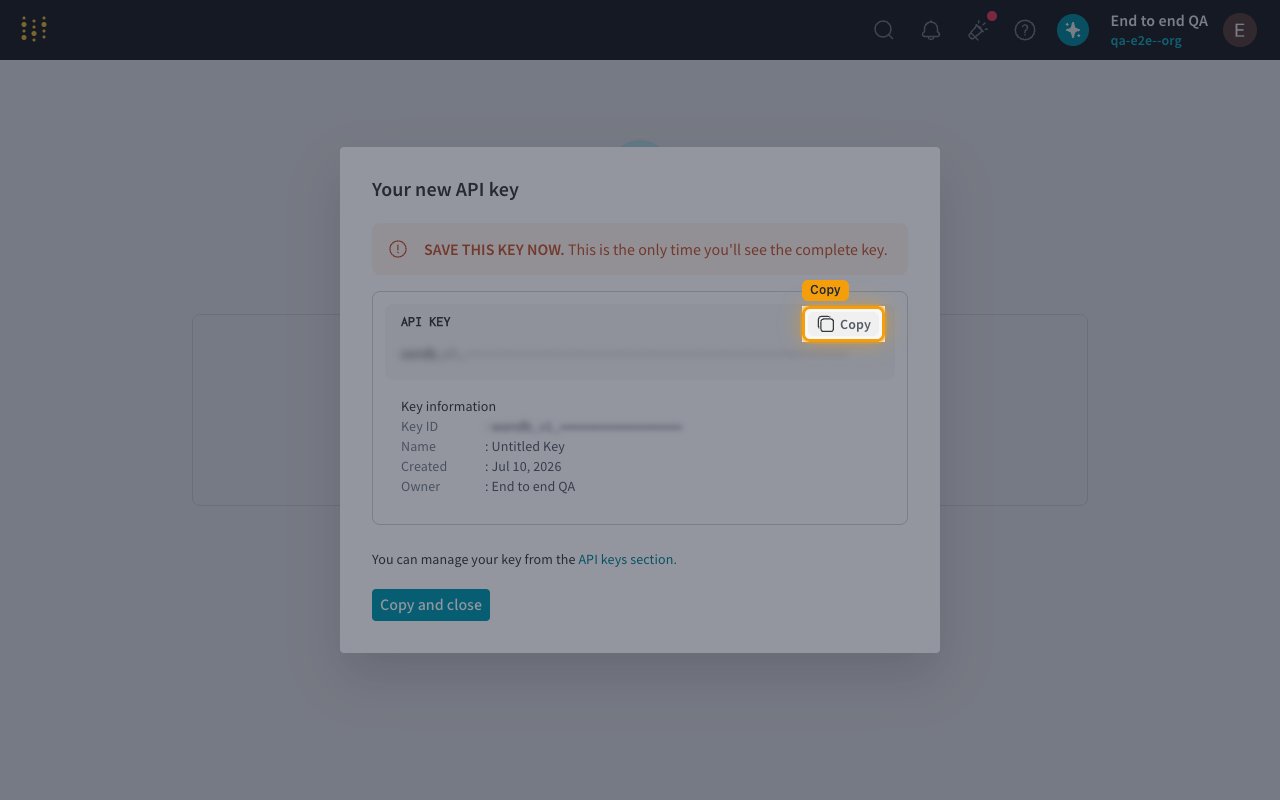
Copy the new key from the Your new API key dialog
On Step 2 the Your new API key dialog appears with the freshly minted key. Click Copy next to the API KEY value to copy the key to your clipboard, or click Copy and close to copy and dismiss the dialog in one step.
- The dialog displays this warning in red: SAVE THIS KEY NOW. This is the only time you’ll see the complete key. The full key is displayed once and cannot be retrieved later.
- Under Key information you can see the Key ID, Name, Created date, and Owner — StackOne only needs the value that is copied by the Copy button, not the Key ID.
- Store the copied key in a secure location. If you lose it, open the API keys section again and use + New key to mint a replacement — the old key cannot be retrieved.
Paste the API key into StackOne Hub
In StackOne Hub, paste the copied value into the W&B API Key field. StackOne sends it as a bearer token on every request to the W&B GraphQL Public API at https://api.wandb.ai.
- W&B API Key — the value you copied from the Your new API key dialog (starts with
wandb_v1_). The key grants full access to your W&B account and should be kept secure. - W&B API keys have no scopes, permission picker, or expiration — a key inherits the full permissions of the user who minted it, so admin-only operations require an admin account.
- To manage existing keys later, open the avatar menu → API keys; from there you can search by name or key ID, mint another + New key, or revoke keys you no longer need.
Optional — Team & Project Names (only for webhook events)
The W&B Team and W&B Project Names fields on the connection are only used if you plan to enable webhook events. Leave both blank if you only need the connector’s CRUD actions (list_runs, get_artifact, create_project, etc.) — those take entity and project names as per-call inputs and work without these fields. If you do want webhooks, follow the two steps below to grab the values.
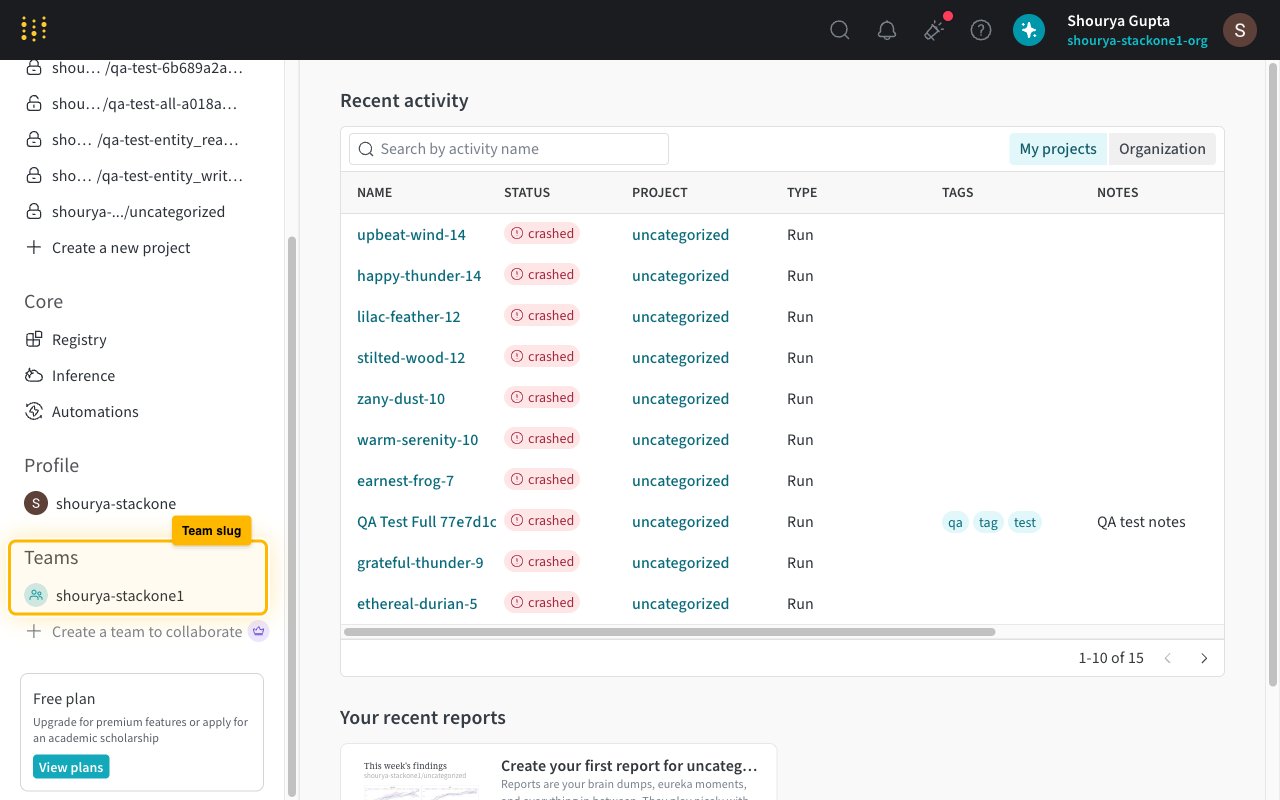
Copy your team slug from the W&B sidebar (or any W&B URL)
Open wandb.ai/home — the left sidebar has a Teams section listing every team you belong to. Each entry is the team slug. It also appears as the segment right after wandb.ai/ in any W&B URL — for https://wandb.ai/acme-research/model-training the slug is acme-research. Paste it into the W&B Team field (single value, no https://, no trailing slash).
Copy the project names from your team's projects page
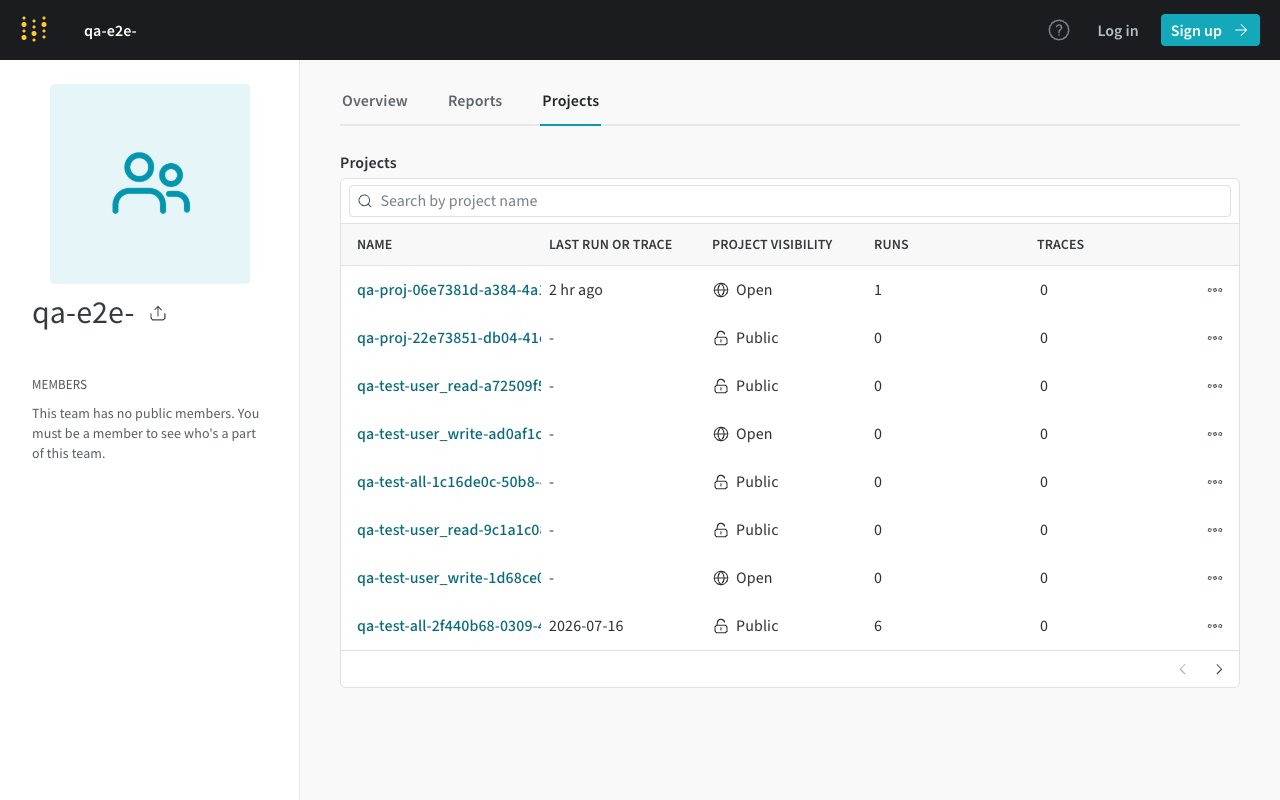
Open https://wandb.ai/<team>/projects (swap in your team slug). The Name column of the projects table is exactly the project slug you paste — the same value that appears after your team slug in per-project URLs. In the W&B Project Names field, enter one or more names separated by commas with no spaces — for example model-training,data-pipeline,experiments. StackOne creates one webhook trigger per project when you toggle an event on.
Linking the Account from the Hub
Navigate to the Hub
Fill out the fields
- W&B API Key
- W&B Team (entity) (Optional)
- W&B Project Names (webhooks) (Optional)
Connect
- Click Connect
- If applicable, the provider will redirect you to a sign-in or authorization page. Complete the provider’s authorization flow.
- Once authorization is successful, you will see a confirmation popup
If the account linking is successful, you will see the newly linked account in your Accounts page.
Next Steps
Webhooks setup
Configure receiving Events for Weights & Biases into StackOne.