> ## Documentation Index
> Fetch the complete documentation index at: https://docs.stackone.com/llms.txt
> Use this file to discover all available pages before exploring further.

# Connect LastPass with API Key – StackOne Hub

> Link a LastPass account in the StackOne Hub using API Key. End-user guide to authorize the integration and start using LastPass actions.

<Warning>Ensure you have <strong>Admin</strong> or <strong>Super Admin</strong> access to the LastPass Admin Console. The Enterprise API is available on LastPass Business and Enterprise plans.</Warning>

<section data-guide-section data-guide-scopes="">
  <h2>Find your account number and create a provisioning hash</h2>

  <p>Both values you need come from the same page in the LastPass Admin Console — the<br /><strong>Enterprise API</strong> page. Your account number (StackOne refers to this as the CID; the<br />LastPass portal labels it <strong>Account number</strong>) is shown at the top of the page, and the<br />Provisioning Hash is generated in the card just below it.</p>

  <Steps>
    <Step title="Sign in to the LastPass Admin Console">
      <div data-guide-step data-guide-scopes="" data-guide-display-scopes-list="">
        <p>Sign in to the <a href="https://admin.lastpass.com" target="_blank" rel="noopener noreferrer">LastPass Admin Console</a> with an account<br />that has <strong>Admin</strong> or <strong>Super Admin</strong> access.</p>
      </div>
    </Step>

    <Step title="Open the Enterprise API page">
      <div data-guide-step data-guide-scopes="" data-guide-display-scopes-list="">
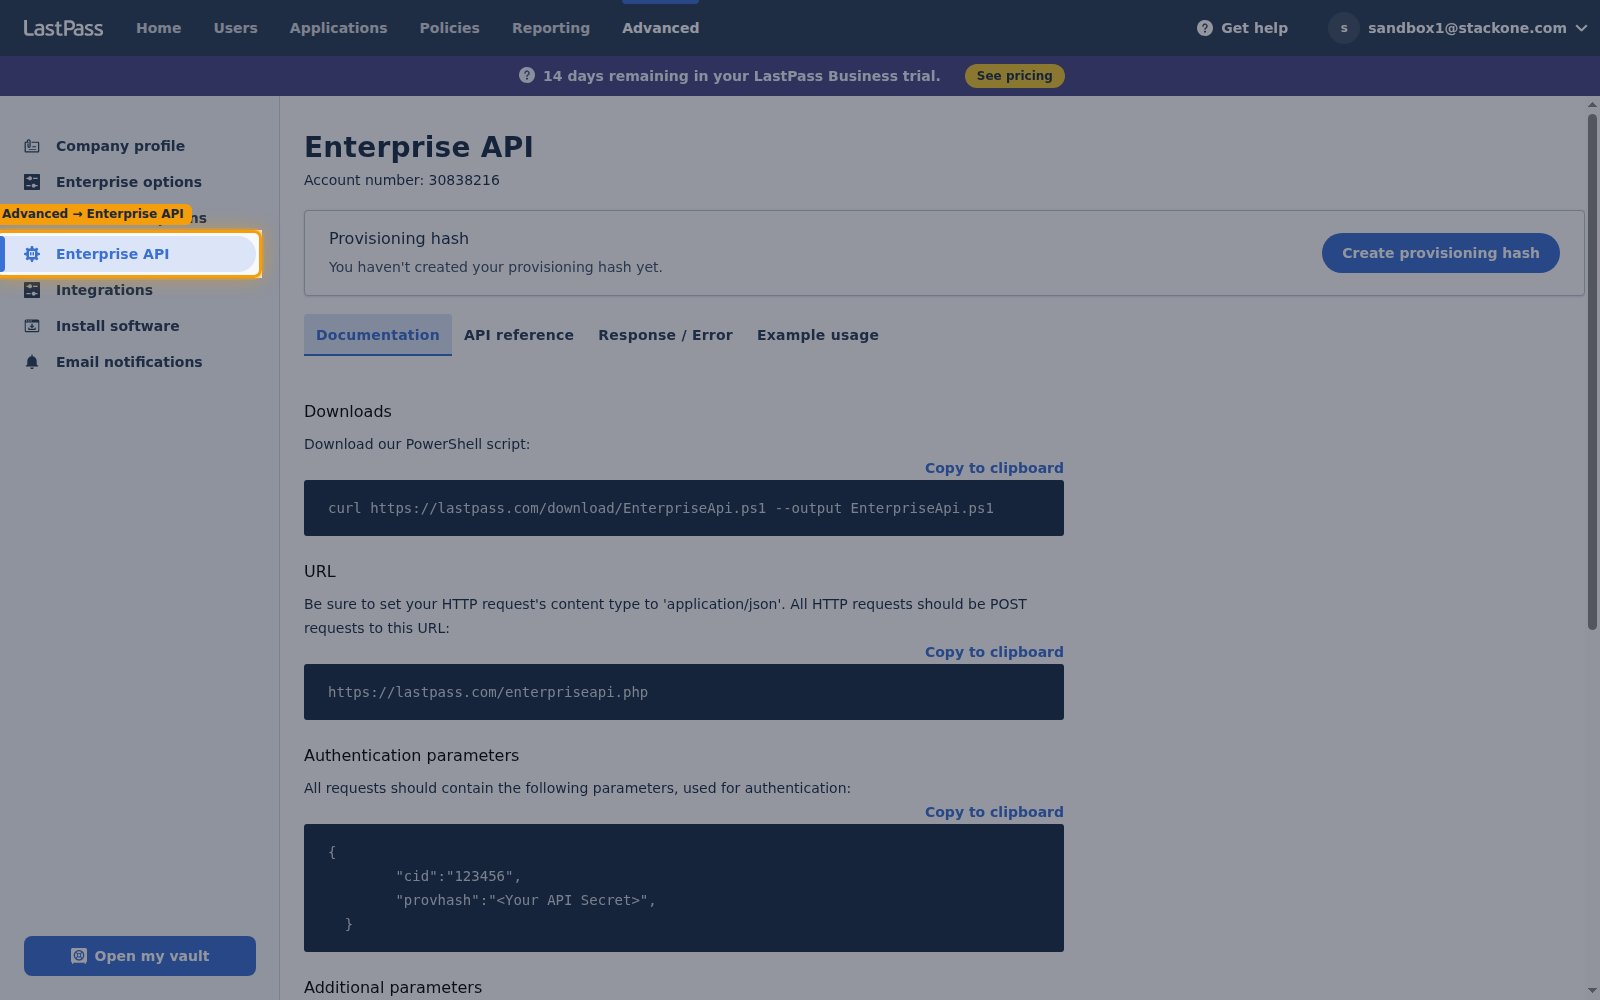
        <p>In the top navigation bar, click <strong>Advanced</strong>. Then, in the left sidebar, select<br /><strong>Enterprise API</strong>.</p>

        <ul>
          <li>The left sidebar lists <strong>Company profile</strong>, <strong>Enterprise options</strong>, <strong>Multifactor options</strong>, <strong>Enterprise API</strong>, <strong>Integrations</strong>, <strong>Install software</strong>, and <strong>Email notifications</strong> — choose <strong>Enterprise API</strong>.</li>
        </ul>

        <img src="https://mintcdn.com/stackone-60/ceIVoVYf4ivG4Paf/connectors/lastpass/images/custom-config-enterprise-api-page.png?fit=max&auto=format&n=ceIVoVYf4ivG4Paf&q=85&s=4e06172943291250c96b211e2a3da7c2" alt="LastPass Admin Console Enterprise API page opened from Advanced in the top navigation and Enterprise API in the left sidebar, showing the Account number and the Create provisioning hash button" width="1600" height="1000" data-path="connectors/lastpass/images/custom-config-enterprise-api-page.png" />
      </div>
    </Step>

    <Step title="Copy your Account Number">
      <div data-guide-step data-guide-scopes="" data-guide-display-scopes-list="">
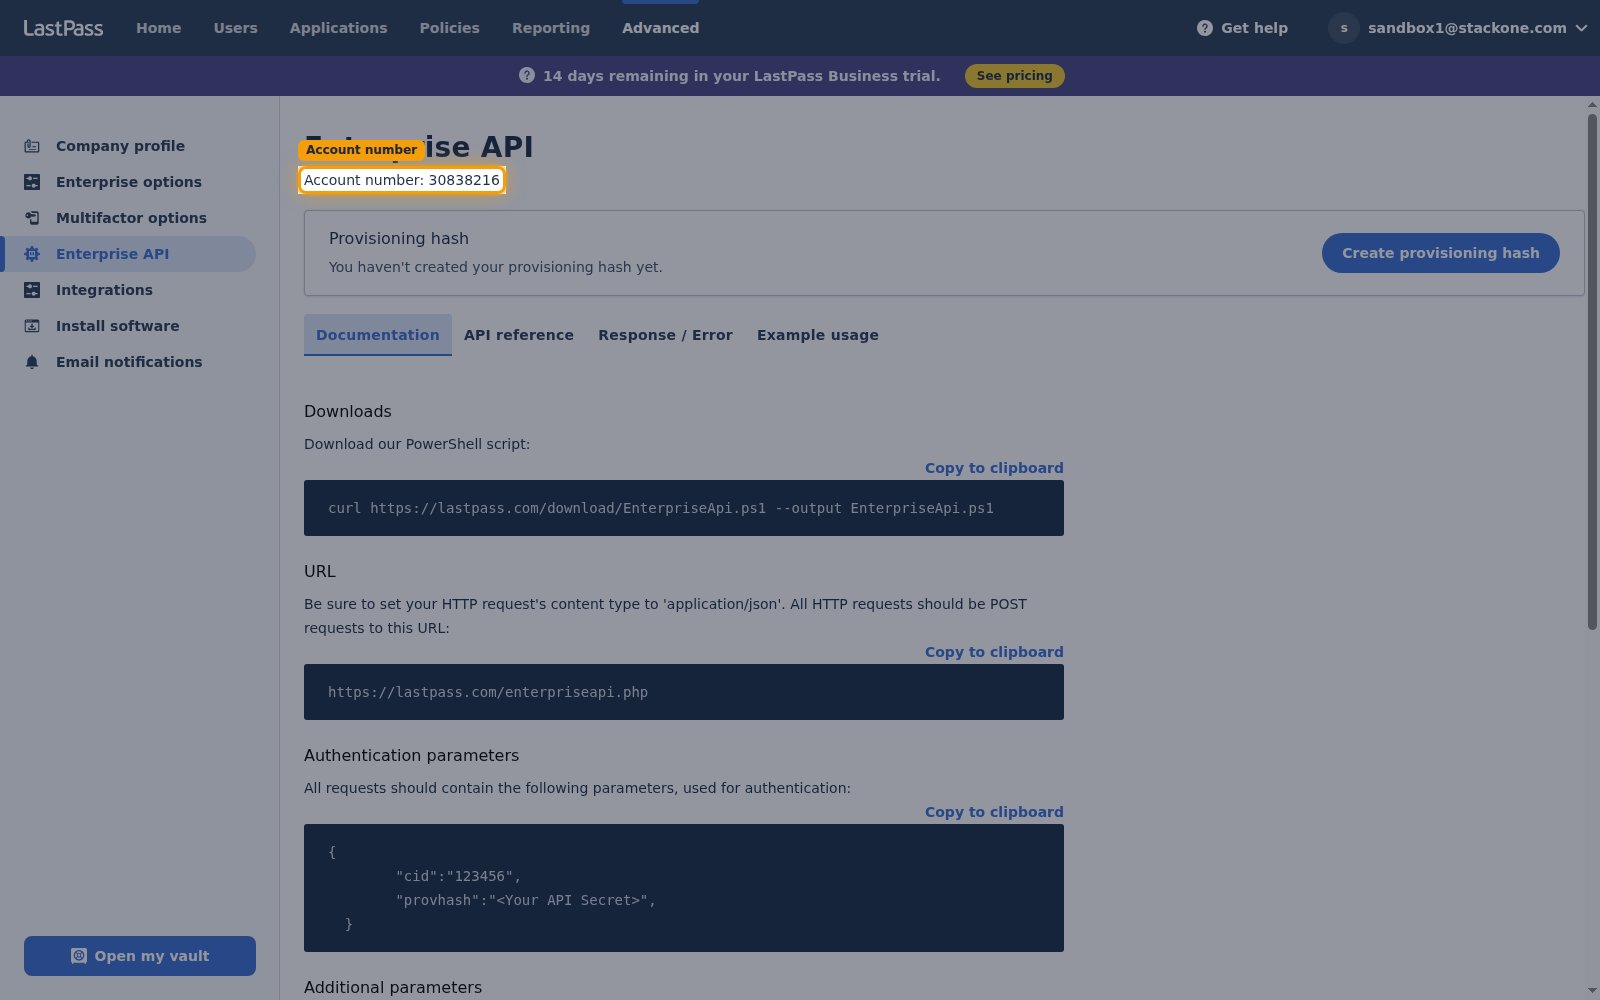
        <p>At the top of the <strong>Enterprise API</strong> page, find <strong>Account number</strong> and copy the<br />value. This is the <strong>Account Number (CID)</strong> field in StackOne Hub.</p>

        <ul>
          <li>Format: a numeric identifier</li>
          <li>Example: `1234567`</li>
          <li>Paste it into the <strong>Account Number (CID)</strong> field in StackOne Hub.</li>
        </ul>

        <img src="https://mintcdn.com/stackone-60/ceIVoVYf4ivG4Paf/connectors/lastpass/images/custom-config-account-number.png?fit=max&auto=format&n=ceIVoVYf4ivG4Paf&q=85&s=60d933e5d9bd2fa51135eee81c803fec" alt="The Enterprise API page with the Account number value highlighted below the Enterprise API heading" width="1600" height="1000" data-path="connectors/lastpass/images/custom-config-account-number.png" />
      </div>
    </Step>

    <Step title="Create the Provisioning Hash">
      <div data-guide-step data-guide-scopes="" data-guide-display-scopes-list="">
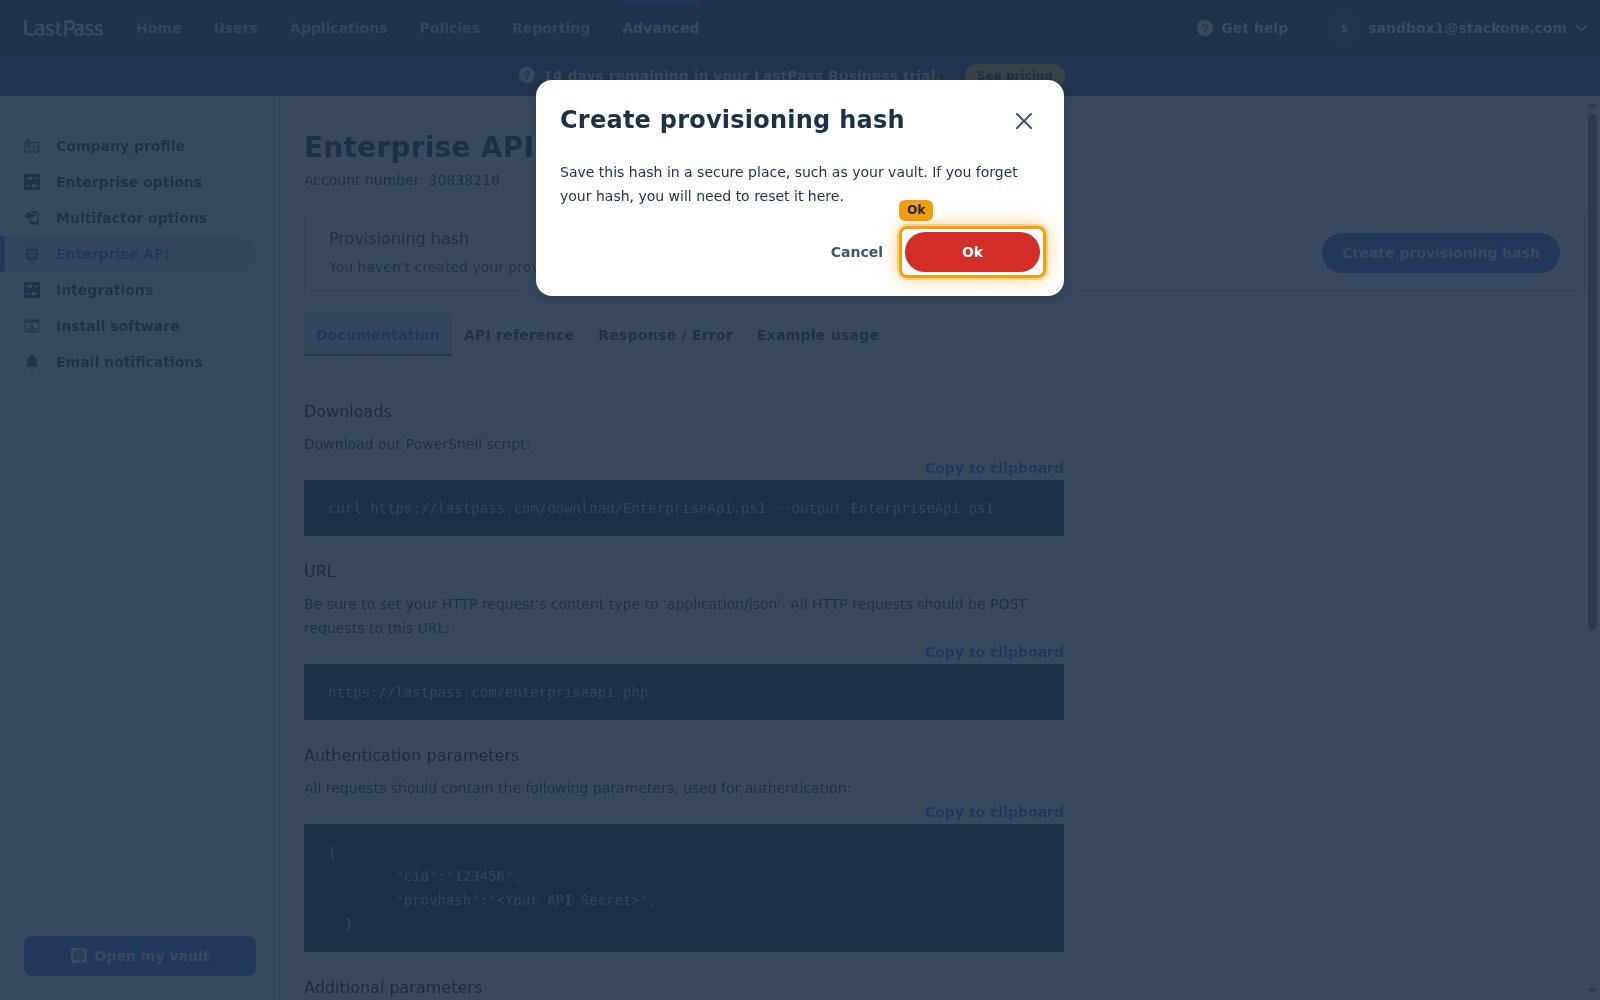
        <p>In the <strong>Provisioning hash</strong> card, click <strong>Create provisioning hash</strong>. A confirmation<br />popup titled <strong>Create provisioning hash</strong> appears with the message "Save this hash in a<br />secure place, such as your vault. If you forget your hash, you will need to reset it<br />here." Click <strong>Ok</strong> to generate the hash.</p>

        <ul>
          <li>The first time you create a hash, LastPass may ask you to verify your email — check your inbox and confirm, then click <strong>Create provisioning hash</strong> again.</li>
        </ul>

        <img src="https://mintcdn.com/stackone-60/ceIVoVYf4ivG4Paf/connectors/lastpass/images/custom-config-create-provisioning-hash-popup.png?fit=max&auto=format&n=ceIVoVYf4ivG4Paf&q=85&s=84754a17b0796d3b79ba97c0bbec4ca2" alt="The Create provisioning hash confirmation popup in the LastPass Admin Console, showing the save-securely message with the Cancel and Ok buttons and Ok highlighted" width="1600" height="1000" data-path="connectors/lastpass/images/custom-config-create-provisioning-hash-popup.png" />
      </div>
    </Step>

    <Step title="Copy the Provisioning Hash">
      <div data-guide-step data-guide-scopes="" data-guide-display-scopes-list="">
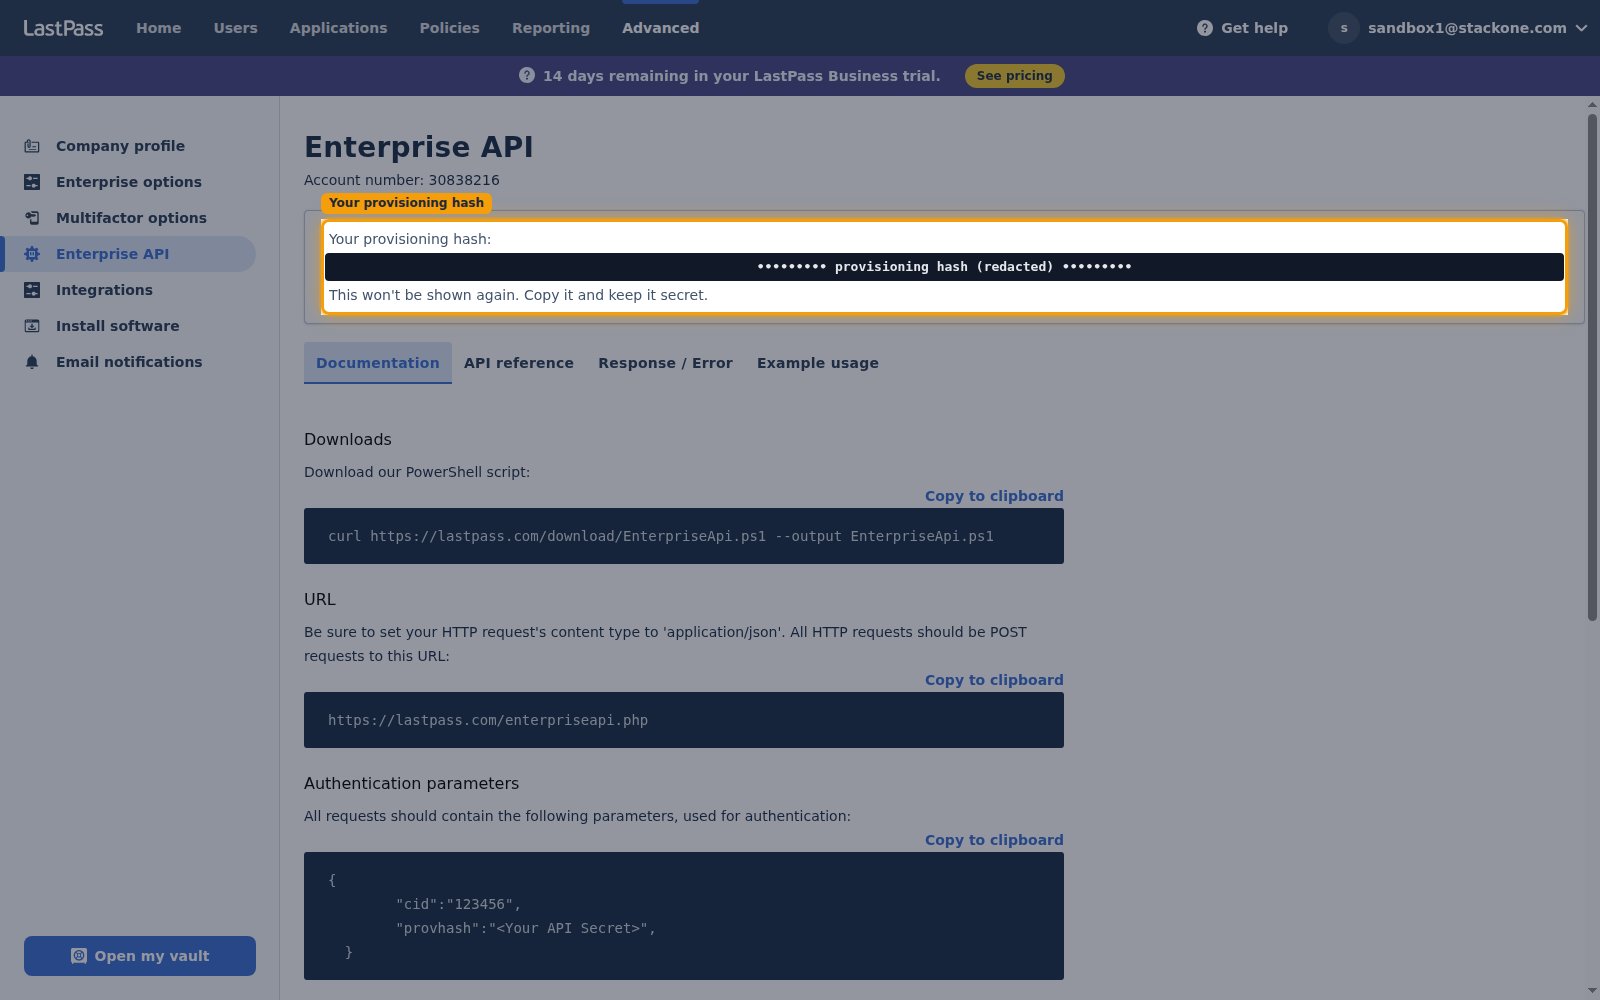
        <p>After you click <strong>Ok</strong>, the hash appears under <strong>Your provisioning hash:</strong> with the note<br />"This won't be shown again. Copy it and keep it secret." Copy the full value.</p>

        <ul>
          <li>The Provisioning Hash is only shown once — copy it immediately and store it securely.</li>
          <li>Paste it into the <strong>Provisioning Hash</strong> field in StackOne Hub.</li>
          <li>To replace it later, click <strong>Reset your provisioning hash</strong> > <strong>Ok</strong>. This invalidates the previous hash and requires updating all existing integrations.</li>
        </ul>

        <img src="https://mintcdn.com/stackone-60/ceIVoVYf4ivG4Paf/connectors/lastpass/images/custom-config-copy-provisioning-hash.png?fit=max&auto=format&n=ceIVoVYf4ivG4Paf&q=85&s=bb4f417ed7120295fa38997e279cd200" alt="The Enterprise API page showing the generated provisioning hash (value redacted) with the note that it will not be shown again and must be copied and kept secret" width="1600" height="1000" data-path="connectors/lastpass/images/custom-config-copy-provisioning-hash.png" />
      </div>
    </Step>
  </Steps>
</section>

<div data-whitelabel-hide>
  <h2>Linking the Account from the Hub</h2>

  <Steps>
    <Step title="Navigate to the Hub">
      Use one of the three <a href="/connect/managing-connectors/linking-accounts">Linking Account Methods</a> to access the Hub.
    </Step>

    <Step title="Fill out the fields">
      Fill out the following fields using details from your provider:

      <ul>
        <li><strong>Account Number (CID)</strong></li>
        <li><strong>Provisioning Hash</strong></li>
      </ul>
    </Step>

    <Step title="Connect">
      <ul>
        <li>Click <strong>Connect</strong></li>
        <li>If applicable, the provider will redirect you to a sign-in or authorization page. Complete the provider's authorization flow.</li>
        <li>Once authorization is successful, you will see a confirmation popup</li>
      </ul>
    </Step>
  </Steps>

  <p>If the account linking is successful, you will see the newly linked account in your <a href="/gateway/concepts/linked-accounts">Accounts</a> page.</p>
</div>