

Registering an OAuth Application
To enable OAuth 2.0 for multi-user Bitly connections, you need to register an OAuth application to obtain a Client ID and Client Secret.
1
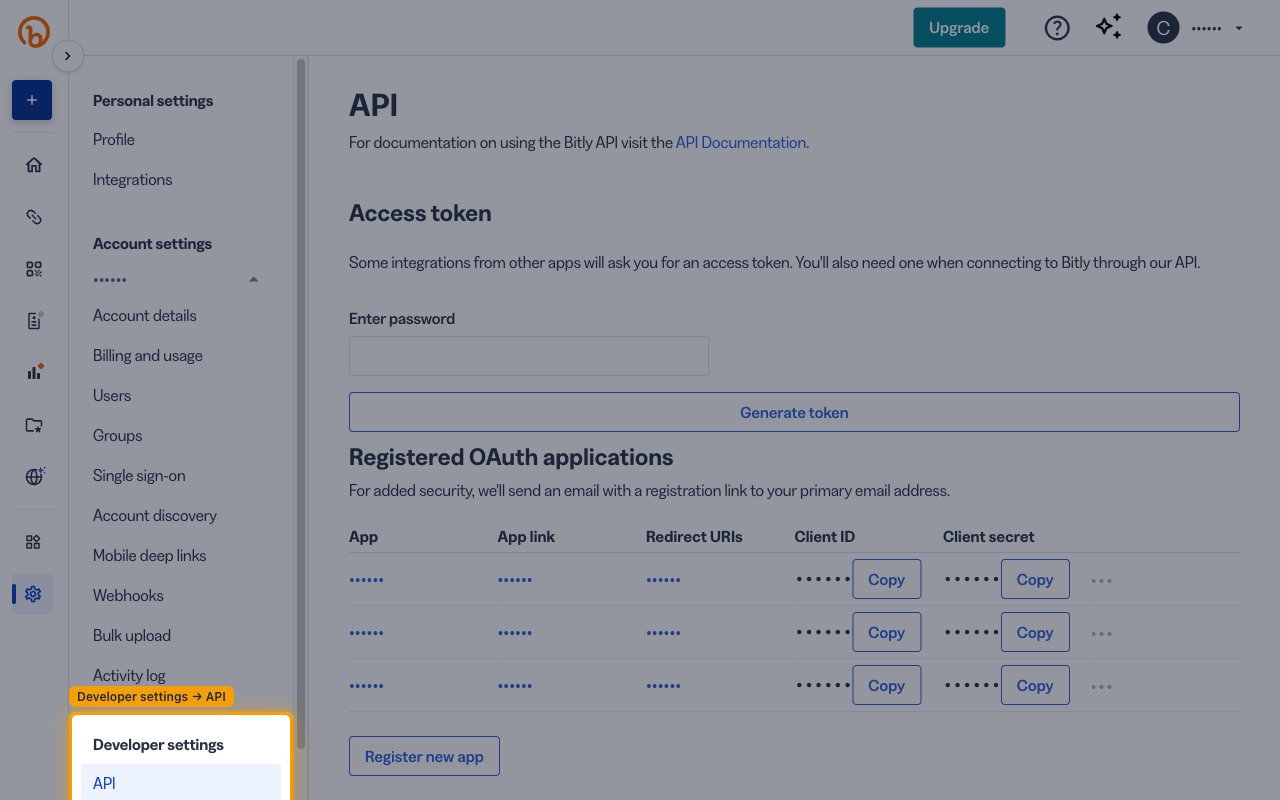
Open Registered OAuth applications
Sign in to your Bitly account and open the OAuth applications settings.
- In the left sidebar, click Settings.
- Under the Developer settings section, click API.
- Scroll down to the Registered OAuth applications section.
2
Register a new application
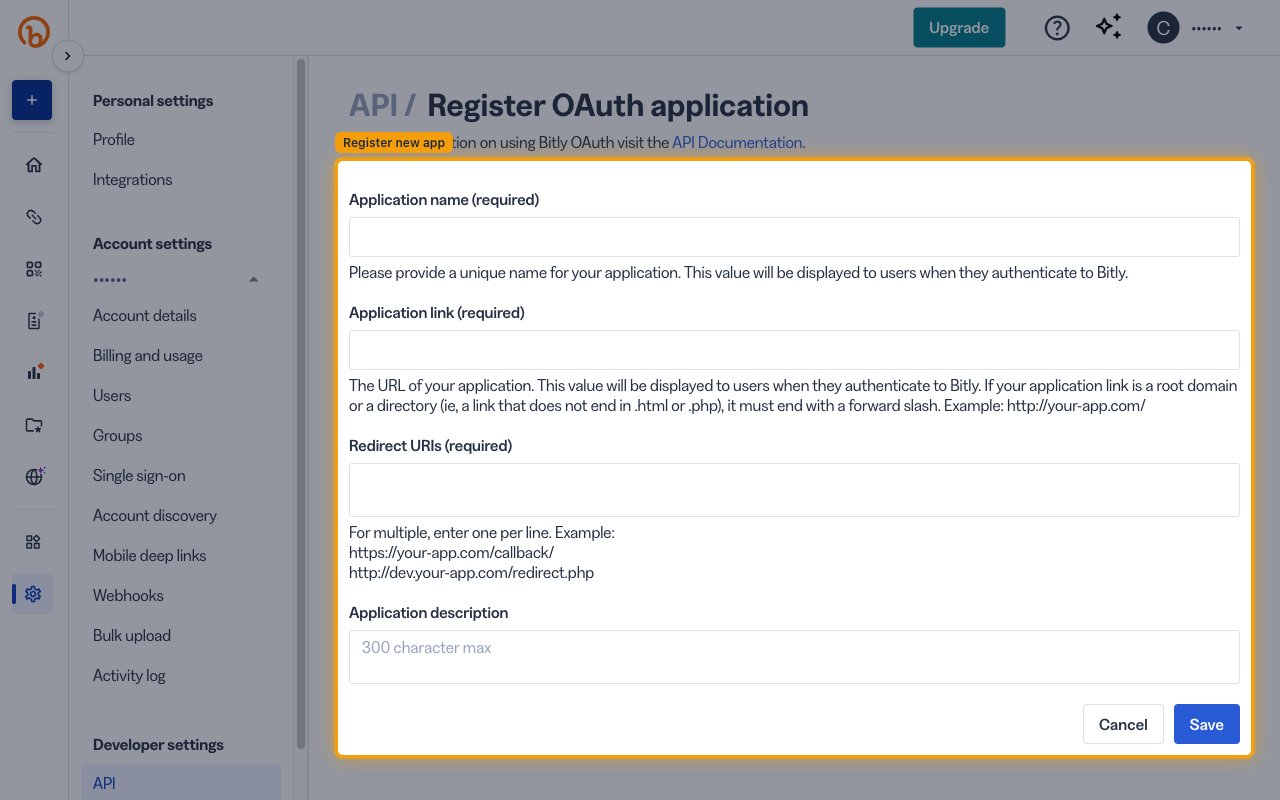
Click Register new app and fill in the application details.
- Application Name: Enter a name (e.g., StackOne)
- Application Link: Enter your company’s website URL (e.g.,
https://yourcompany.com) - Redirect URI:
https://api.stackone.com/connect/oauth2/bitly/callback - Application Description: Brief description of the integration
- Click Save to submit.
3
Retrieve Client ID and Client secret
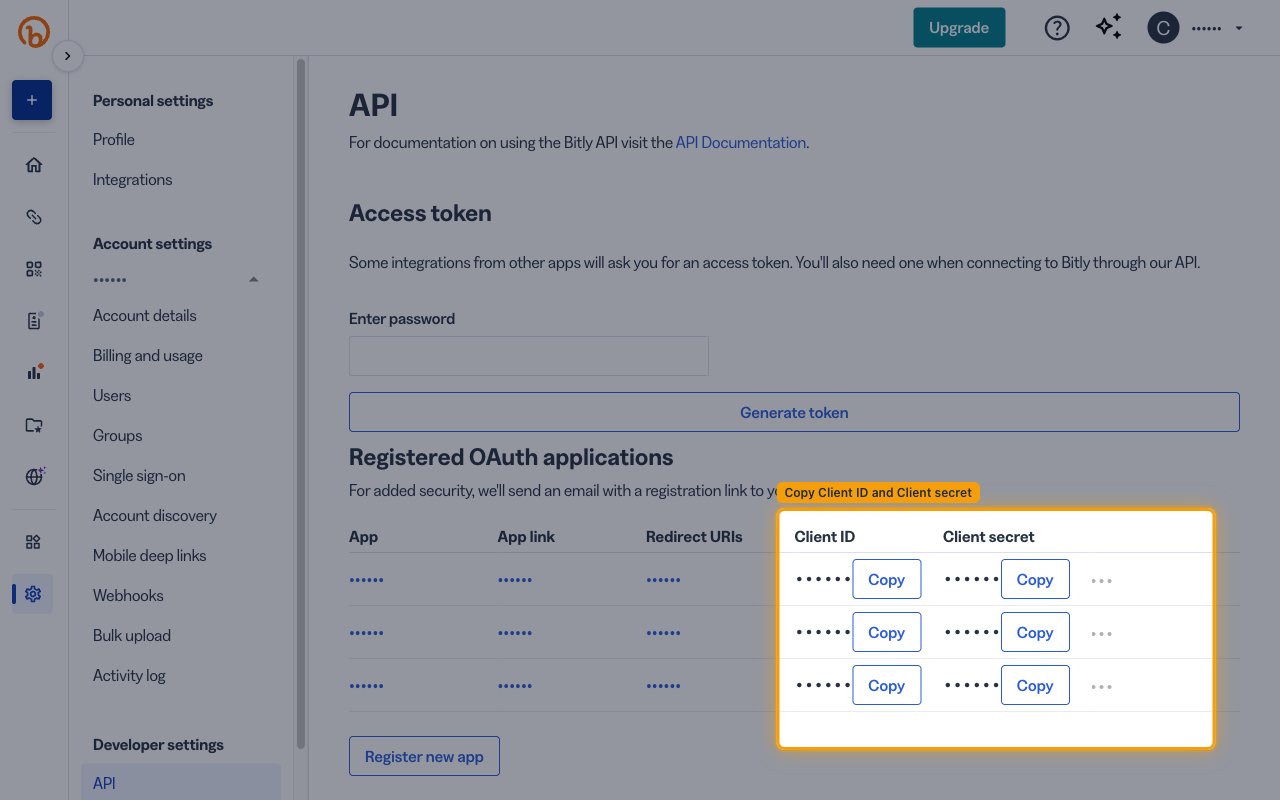
After you click Save, Bitly shows a Successfully registered OAuth app message and automatically returns you to the Registered OAuth applications list — no manual navigation is needed.
- Locate your newly registered application in the list.
- Copy the Client ID value.
- Copy the Client secret value.
- Store both values securely for use later.
Creating the StackOne Connector Profile
To create the Connector Profile in StackOne for Bitly:1
Navigate to Connector Profiles
Login to StackOne and navigate to Connector Profiles
2
Create New Connector Profile
- Click + Connector Profile
- Search for and select Bitly
- Select Type as OAuth 2.0
- Fill out the fields using details retrieved from your provider:
- Client ID
- Client Secret
- (Optional) Select Actions to be enabled for this Connector Profile
- Click Create profile