

Prerequisites
- Org Admin role in your StackOne organization.
- An SSO connection for your organization with its email domain verified, for example
acme.com. SCIM Provisioning attaches to that connection, and StackOne links each provisioned user to your organization by the verified domain. - Access to the Microsoft Entra admin center with permission to manage the enterprise application, such as the Application Administrator role.
The Provisioning tab and its Directory Sync card are enabled per organization. If you don’t see them on your SSO connection, even as an Org Admin, contact StackOne support to turn on SCIM Provisioning for your organization.
Link SCIM in StackOne
SCIM Provisioning lives on your SSO connection. Open it to mint the credentials Microsoft Entra needs and to choose what provisioned members receive.1
Open the Directory Sync card and click Link SCIM
In the StackOne dashboard, go to Organization > Security > SSO and open your SSO connection, for example Acme Entra. Select the Provisioning tab, find the Directory Sync card, and click Link SCIM to open the Directory Sync panel.
2
Copy the SCIM base URL and provisioning token
Under SCIM Details, StackOne shows the SCIM base URL and a provisioning token. Copy both now. The token is displayed once and cannot be retrieved later, so store it before you close the panel.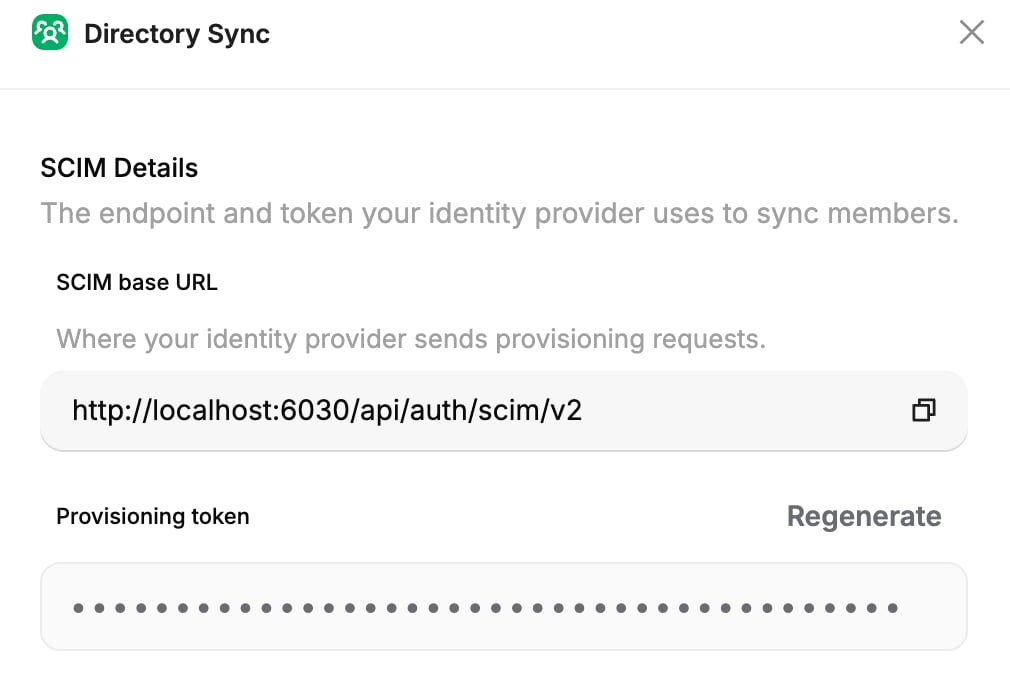
3
Set the provisioned access
On the Provisioned access card, select Manage access. Choose the projects provisioned members join and a role for each one (Viewer, Member, or Admin), then click Save changes. StackOne applies these to every member Microsoft Entra provisions, so pick the least-privilege role that fits each project. This access is shared with JIT provisioning.
The SCIM base URL always ends in
/api/auth/scim/v2, the SCIM 2.0 endpoint Microsoft Entra provisions against. If you regenerate the token in StackOne, the previous one stops working immediately, so update the Secret Token in Microsoft Entra to match or provisioning fails.Configure provisioning in Microsoft Entra
Point the enterprise application at StackOne’s SCIM endpoint. Use the same application you set up for SSO.1
Open provisioning
In the Microsoft Entra admin center, go to Enterprise applications and open your application, for example Acme Entra. Select Provisioning, then Connect your application to set up automatic provisioning.
2
Enter the StackOne credentials
Set the authentication method to Bearer authentication, then under Admin Credentials fill in the two fields with the values from StackOne: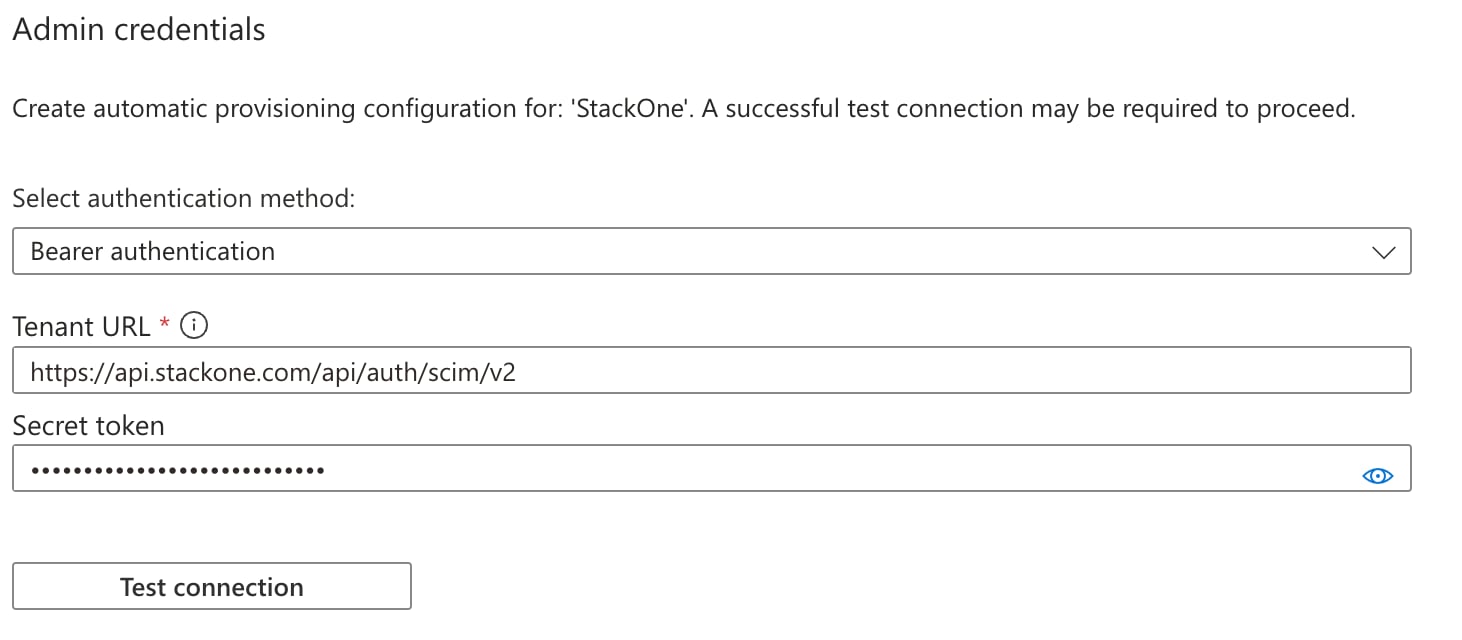
3
Test the connection and save
Click Test Connection. Microsoft Entra calls StackOne with the credentials and confirms they work. When the test passes, select Create to save the configuration.
4
Start provisioning
Select Start provisioning to begin the first cycle. Microsoft Entra provisions your assigned users, then re-syncs roughly every 40 minutes.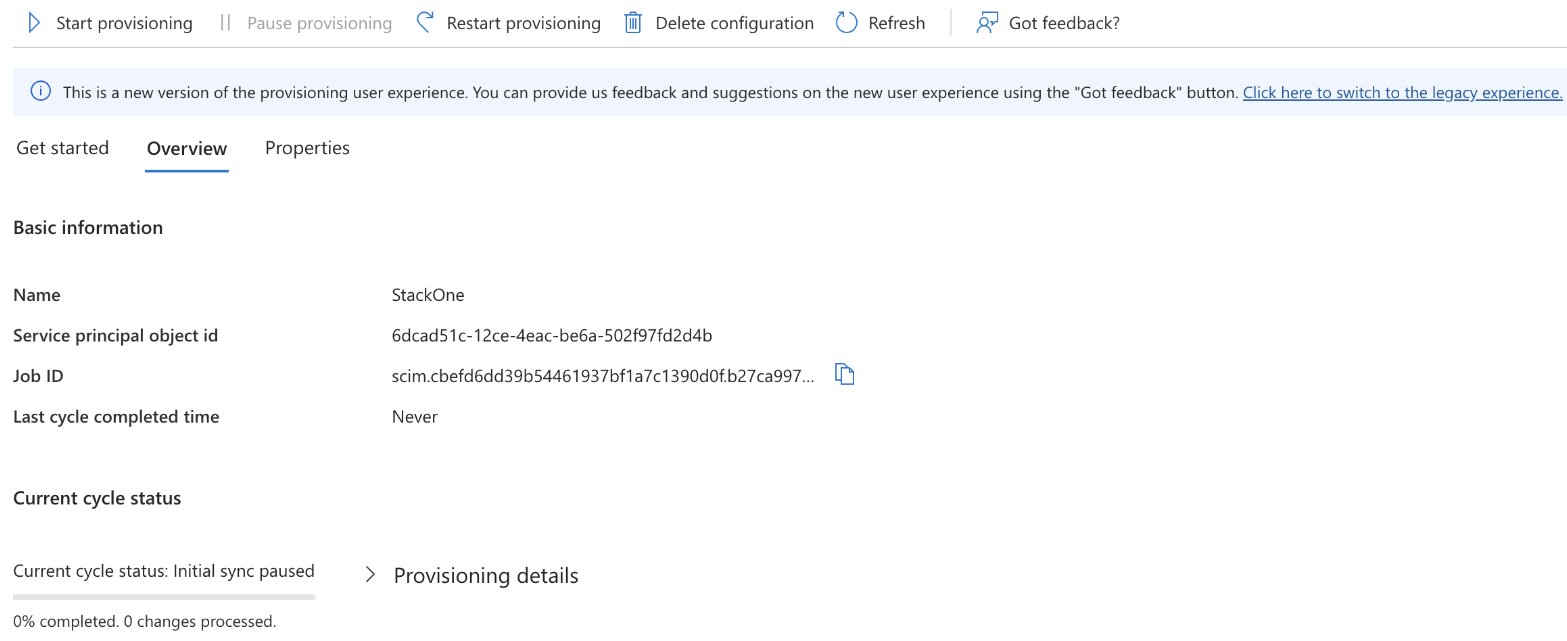
Assign users and groups
Microsoft Entra provisions only the users you assign to the application. Assign the people who should have StackOne access.1
Assign users and groups to the application
In the same enterprise application, open Users and groups and add the users or groups to sync, such as the Finance group. On its next cycle, Microsoft Entra creates a StackOne member for each assigned user, and StackOne applies the default role and projects you chose.
Unassign a user from the application, or disable their Microsoft Entra account, and the next cycle deactivates the matching StackOne member, removing their access automatically.
Provision groups
Microsoft Entra can provision the groups you assign to the application as well as their members. Each becomes a synced group in StackOne that keeps its membership in step with Entra.1
Enable group provisioning
In the application’s Provisioning settings, open Mappings and make sure Provision Microsoft Entra ID Groups is Enabled.
2
Assign the group
Under Users and groups, assign the group, such as Finance. On the next cycle, Entra provisions the group’s direct members as StackOne members and the group itself as a synced group. Nested groups aren’t expanded, so assign the groups that directly contain the people you want.
3
Confirm in StackOne
Go to Organization > Manage Team and open the Groups tab. The group is listed with a Synced tag. Assign it to projects from its Projects tab. If StackOne already had an empty group with that name, it became the synced group and kept its access. See Prepare the access before you push.
Next steps
SCIM Provisioning overview
How SCIM provisioning works and how it attaches to your SSO connection.
Okta SCIM Provisioning
Set up SCIM provisioning with Okta instead of Microsoft Entra.