

How SCIM Provisioning works
SCIM Provisioning links your IdP to that SSO connection and keeps its membership aligned with your directory.SCIM Provisioning can also push your identity provider’s groups into StackOne as synced groups, which you assign to projects and accounts like any other group. See SCIM Groups.
An organization has a single SCIM Provisioning. If you run more than one SSO connection, it binds to the oldest one and appears on every connection’s Provisioning tab. Link and manage it there, and point one IdP at the SCIM base URL. StackOne doesn’t support more than one SCIM source per organization.
Provisioning
When you assign a user to the StackOne application in your IdP, StackOne:- Adds them to your organization at the Viewer role, or Admin when your identity provider sends a
rolesvalue ofadmin. See organization role from your identity provider for the mapping. - Grants them the connection’s provisioned access: the projects you selected, each at the role you set for it (Viewer, Member, or Admin).
- Adds them to any synced groups your identity provider pushes them into, so they inherit the access those groups grant.
- Marks their email as verified only when your organization has DNS-verified that email’s domain, so SSO can recognize and link the same person the first time they sign in.
The organization role is set the first time a user is provisioned. Changing the
roles value in your identity provider later doesn’t change an existing member’s role. Adjust an existing member’s role from the dashboard instead.Deprovisioning
When you deactivate or remove a user in your IdP, StackOne suspends their access to that organization, removes them from their synced groups, and signs them out. The suspension is an org-scoped ban, so the user keeps any access they have in other organizations. Reactivating the user in your IdP lifts the suspension, unless an admin applied the ban manually from the dashboard. Only members this connection provisioned are affected. A member who joined by invitation, or who was provisioned by a different connection, is left untouched. SCIM Provisioning also won’t deactivate the last active admin of an organization, so a sync can’t lock everyone out, to offboard your last admin, promote or provision another org admin first.Two deactivations intentionally fail on StackOne’s side and appear as errors in your IdP’s provisioning log. Both are expected and safe to ignore:
- Deactivating the last active admin is refused. Your IdP surfaces a failed provisioning action for that user and retries it on each sync.
- Deactivating a member this connection didn’t provision, someone who joined by invitation, or was synced by a different connection, returns “user not found”.
Prerequisites
- A verified SSO connection for your organization, since SCIM Provisioning is enabled on it. See SSO overview.
- The Org Admin role.
The projects and roles synced members receive are the connection’s shared provisioned access, set on the Provisioned access card of the Provisioning tab. JIT provisioning applies the same set, so configuring it once covers both.
Enable SCIM Provisioning
Link SCIM from the SSO connection’s Provisioning tab, then finish the setup in your IdP.1
Set the provisioned access
In the StackOne dashboard, go to Organization > Security > SSO and open your verified SSO connection. Select the Provisioning tab, then, on the Provisioned access card, select Manage access.Pick the projects synced members should join and choose a role for each one (Viewer, Member, or Admin), then select Save changes. Pick the least-privilege role that fits each project. Every provisioned user is still added to your organization at the Viewer role (or Admin from your identity provider), regardless of the project roles you choose. This access is shared with JIT provisioning.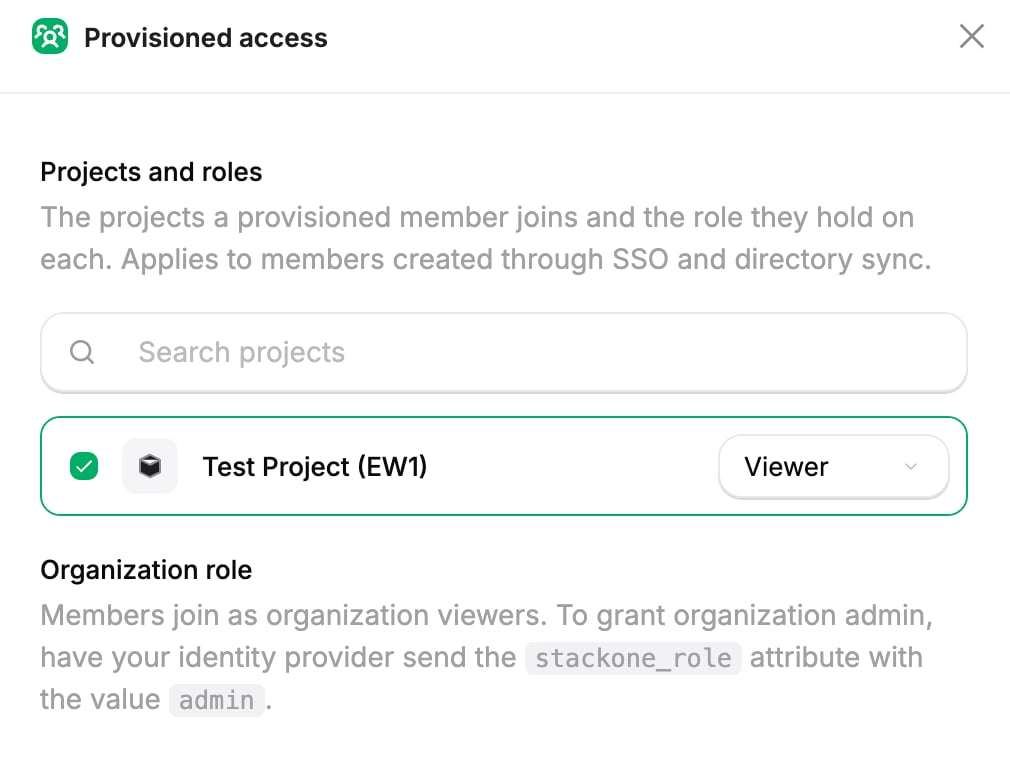
2
Link SCIM
On the Directory Sync card, select Link SCIM. StackOne creates the connection and opens the Directory Sync panel with your SCIM credentials. If you haven’t set any provisioned access yet, linking walks you through picking it first.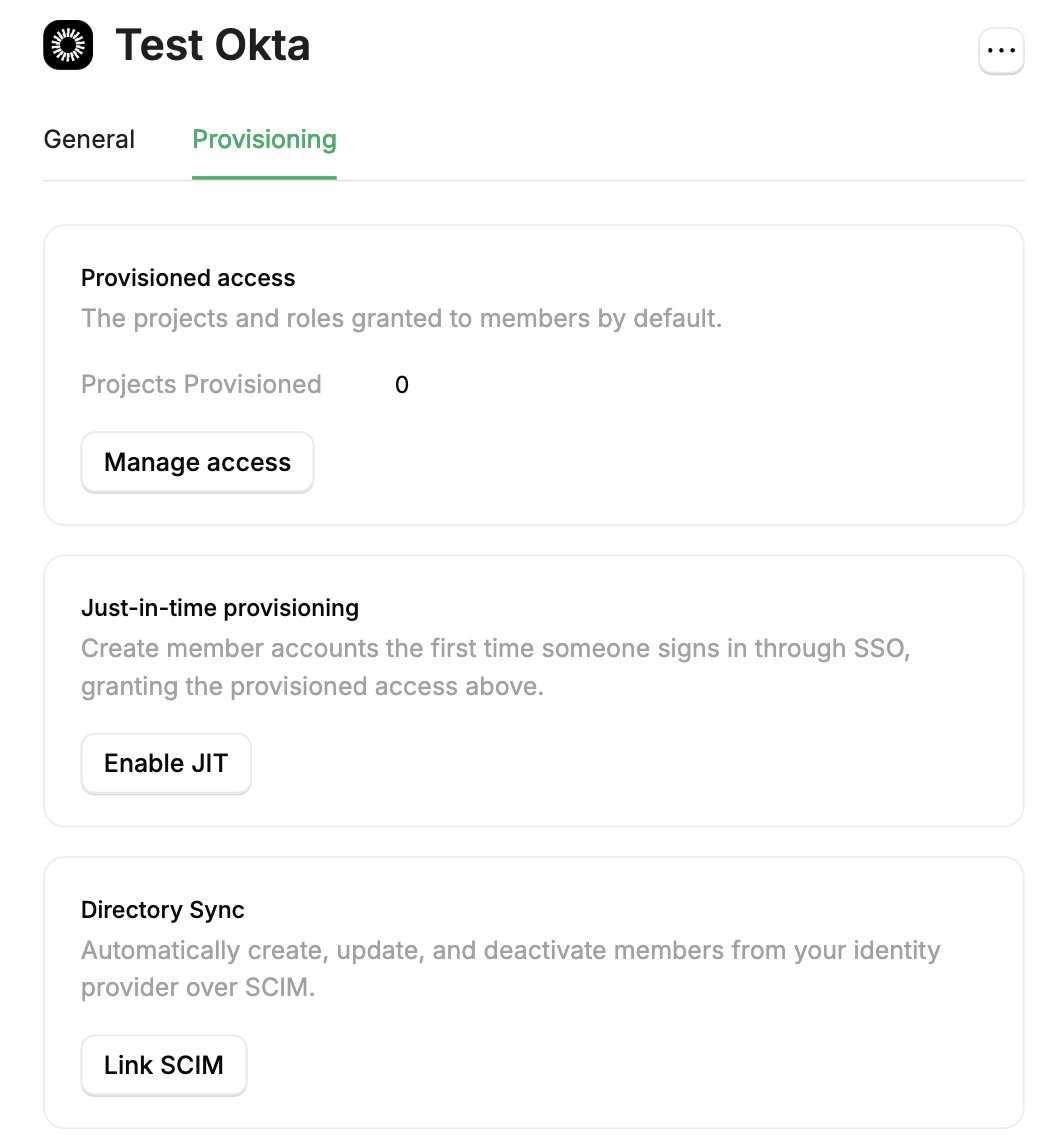
3
Copy the SCIM base URL and token
In the SCIM Details section, copy the SCIM base URL and the Provisioning token. You paste both into your IdP.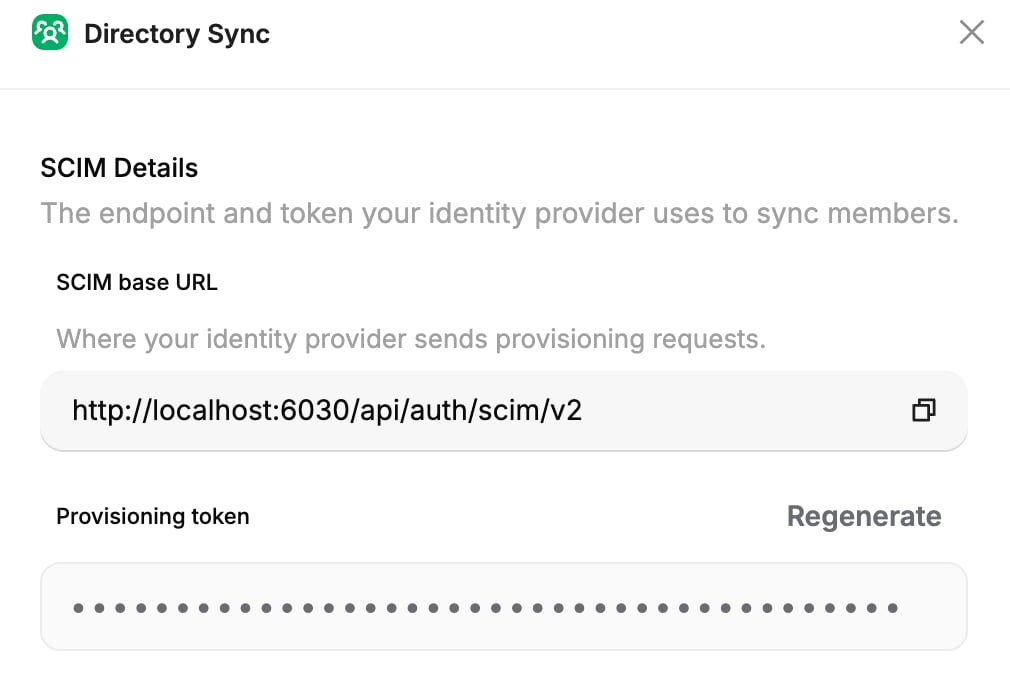
4
Configure your identity provider
In your IdP, enable provisioning for the StackOne application, paste in the SCIM base URL and token, then assign the users who should sync. Follow the guide for your IdP in Next steps.
Manage or remove SCIM Provisioning
Manage the connection from the Directory Sync card on the SSO connection’s Provisioning tab.- Edit SCIM reopens the Directory Sync panel to rotate the token. To change the projects synced members join or their roles, use Manage access on the Provisioned access card instead.
- Unlink stops all future provisioning and revokes the SCIM token. Members synced so far keep their access, and synced groups become normal groups that keep their members and assignments. You can link again later, but StackOne mints a new token, the SCIM base URL doesn’t change, so you only need to paste the new token back into your IdP.
Next steps
Set up SCIM Provisioning with Okta
Enable SCIM provisioning on an Okta SSO connection.
Set up SCIM Provisioning with Microsoft Entra
Enable SCIM provisioning on a Microsoft Entra SSO connection.
SSO overview
Set up the SSO connection that SCIM Provisioning builds on.
SCIM Groups
Push your identity provider’s groups into StackOne and grant access through them.