

Create an integration in the Dev Dashboard
The Envoy Client API Key is a long-lived token generated for an integration in the Envoy Dev Dashboard. Create the integration, then copy the key into StackOne Hub.
Open the Dev Dashboard
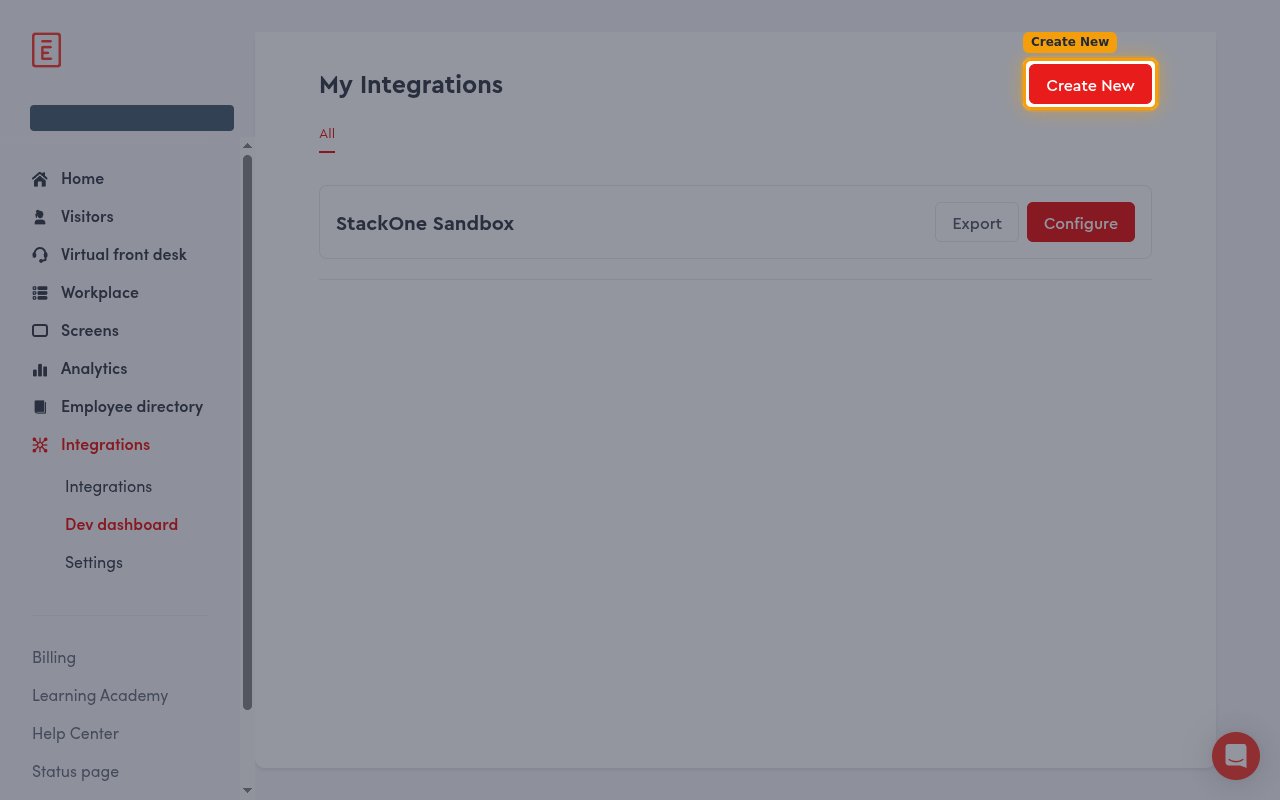
Sign in to the Envoy dashboard. In the left sidebar, expand Integrations and click Dev dashboard to open the My Integrations page, then click Create New in the top-right corner.
Enter the integration details
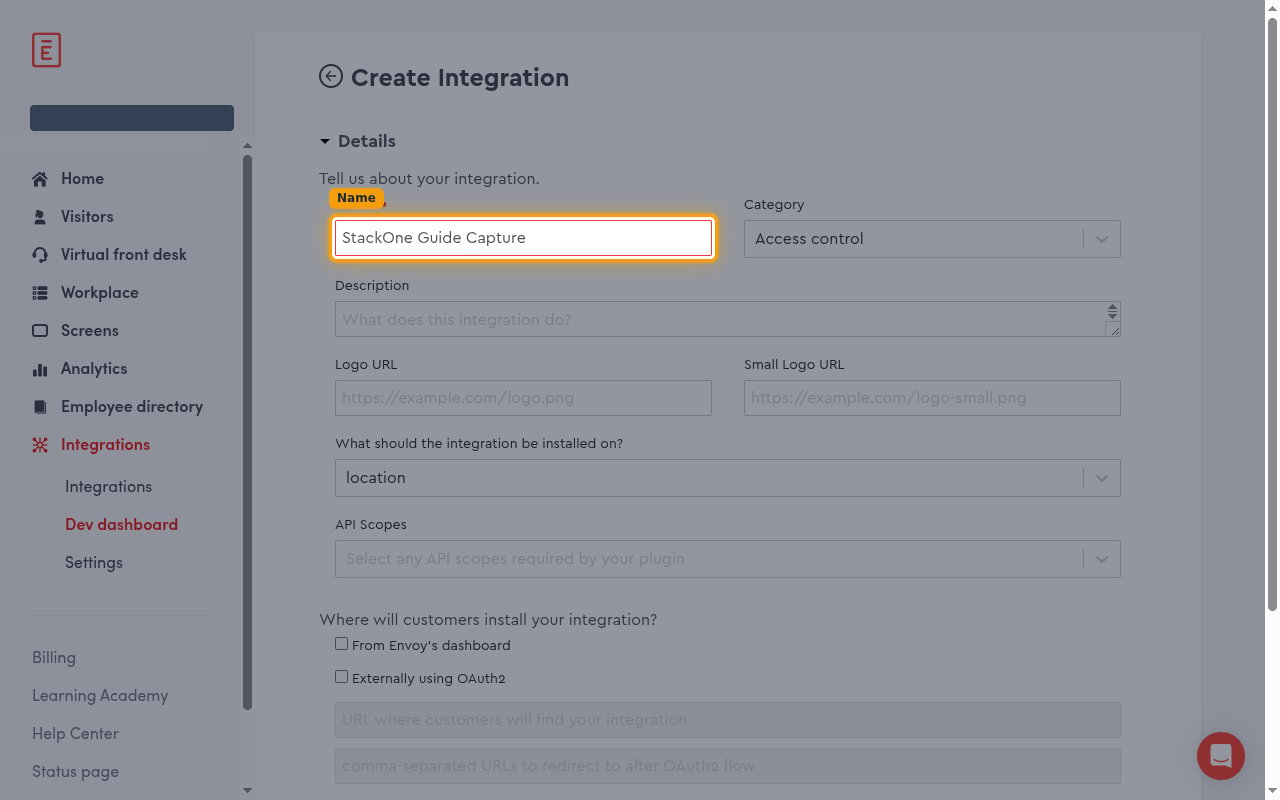
On the Create Integration screen, under Details, type a recognisable name in the Name field (for example, StackOne). The other fields — Category, Description, Logo URL — are optional.
Add the API scopes
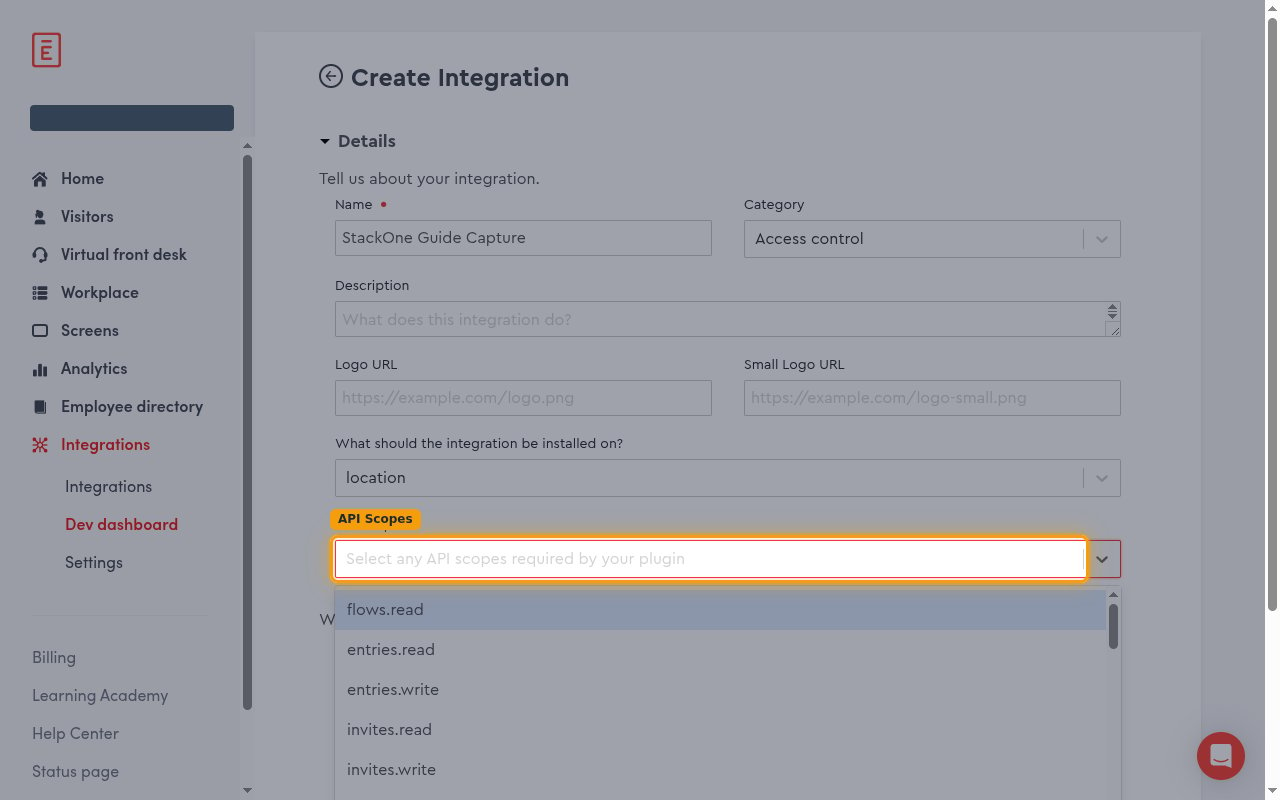
Open the API Scopes dropdown and select every scope the integration needs. These scopes control what data the Client API Key can access — add all of the scopes below so every StackOne action works.
Save the integration
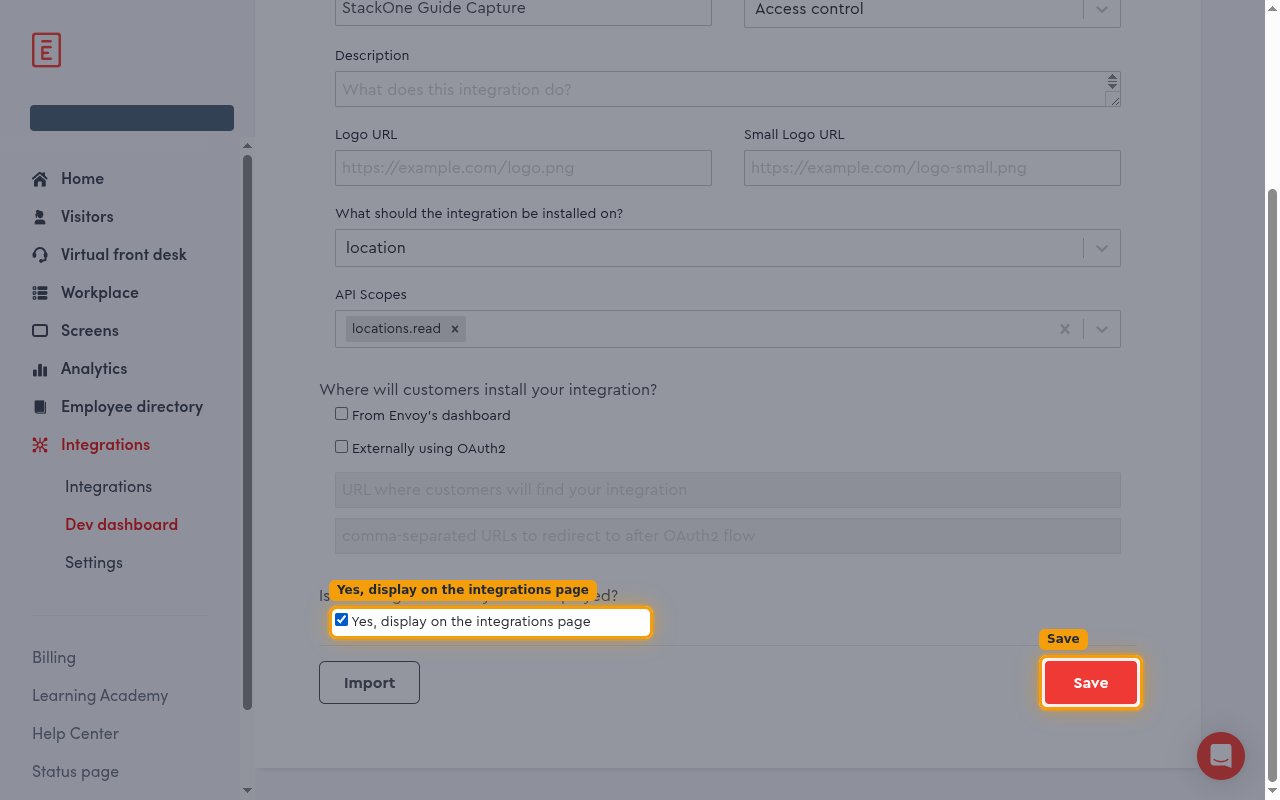
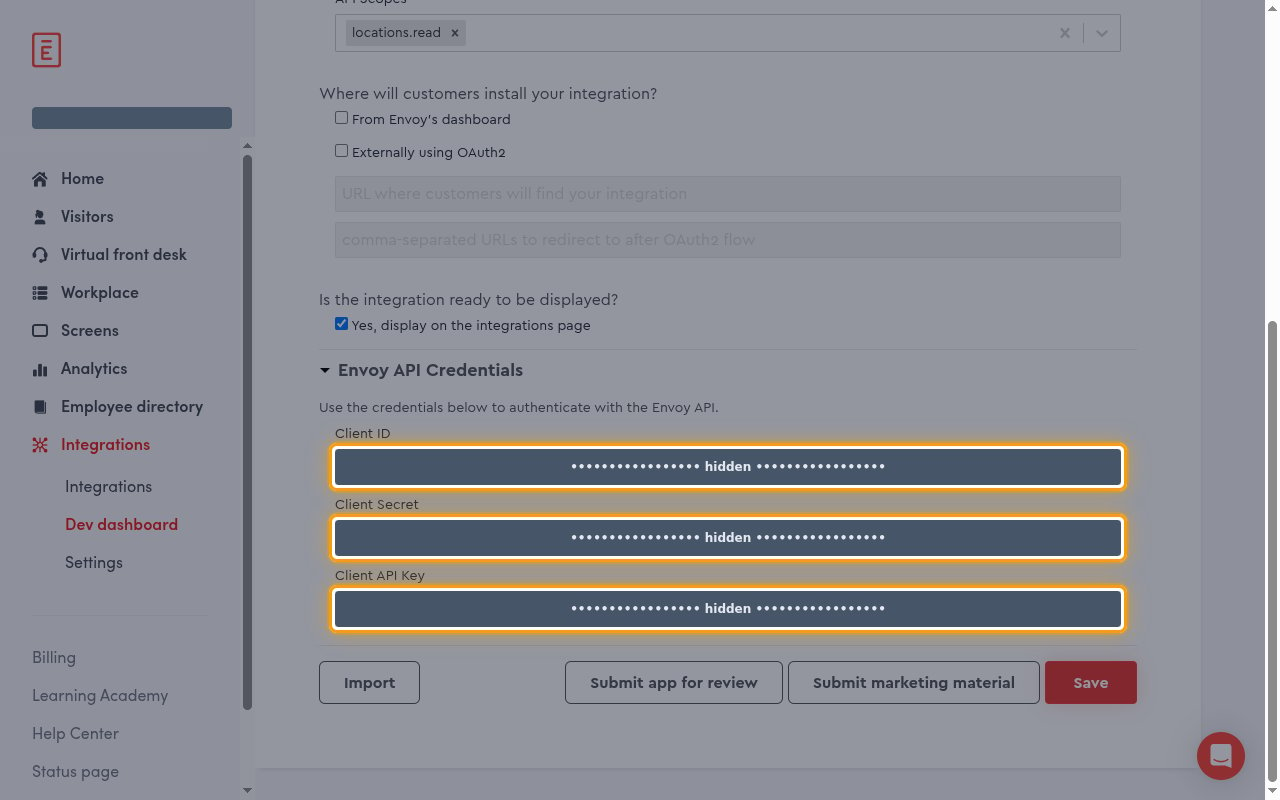
Tick Yes, display on the integrations page, then click Save. Envoy generates the credentials only after the first save.
Copy the Client API Key
After saving, the Envoy API Credentials section appears with the long-lived key.
Copy the Client API Key into StackOne Hub
In the Envoy API Credentials section, copy the Client API Key value and paste it into the Client API Key field in StackOne Hub.
- Client API Key — a long-lived token sent on every request. Treat it like a password and store it securely; it is shown here so you can copy it before leaving the page.
Linking the Account from the Hub
Navigate to the Hub
Fill out the fields
- Client API Key
Connect
- Click Connect
- If applicable, the provider will redirect you to a sign-in or authorization page. Complete the provider’s authorization flow.
- Once authorization is successful, you will see a confirmation popup
If the account linking is successful, you will see the newly linked account in your Accounts page.