

Register Your Application in Microsoft Entra ID
Register an application in Microsoft Entra ID to obtain OAuth 2.0 client credentials for the integration.
Sign in to Microsoft Entra Admin Center
Sign in to the Microsoft Entra admin center. If you have access to multiple tenants, click the Settings (gear) icon in the top-right corner, then select the desired tenant from the list under Directory + subscription.
Navigate to App Registrations
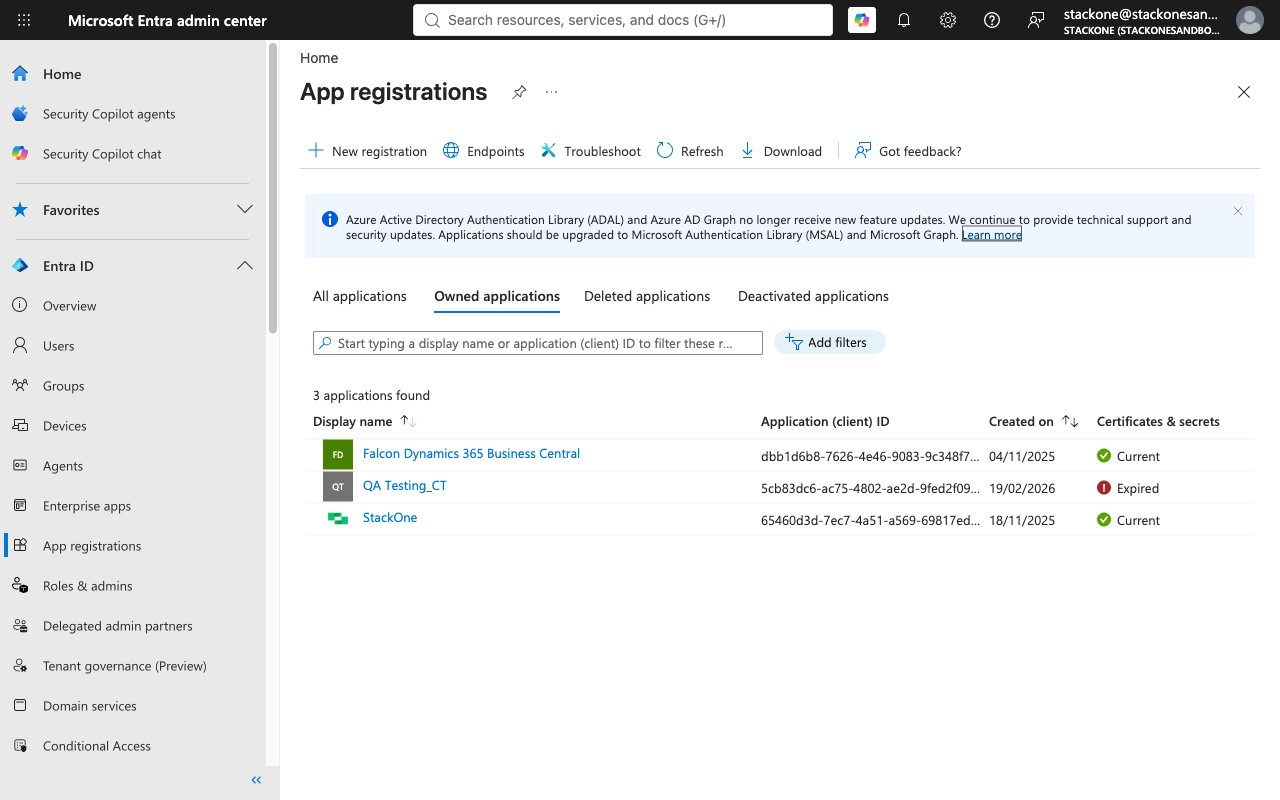
In the left navigation under Entra ID, click App registrations. You will see a list of your existing registered applications.
Create a New App Registration
Click New registration in the toolbar at the top of the page.
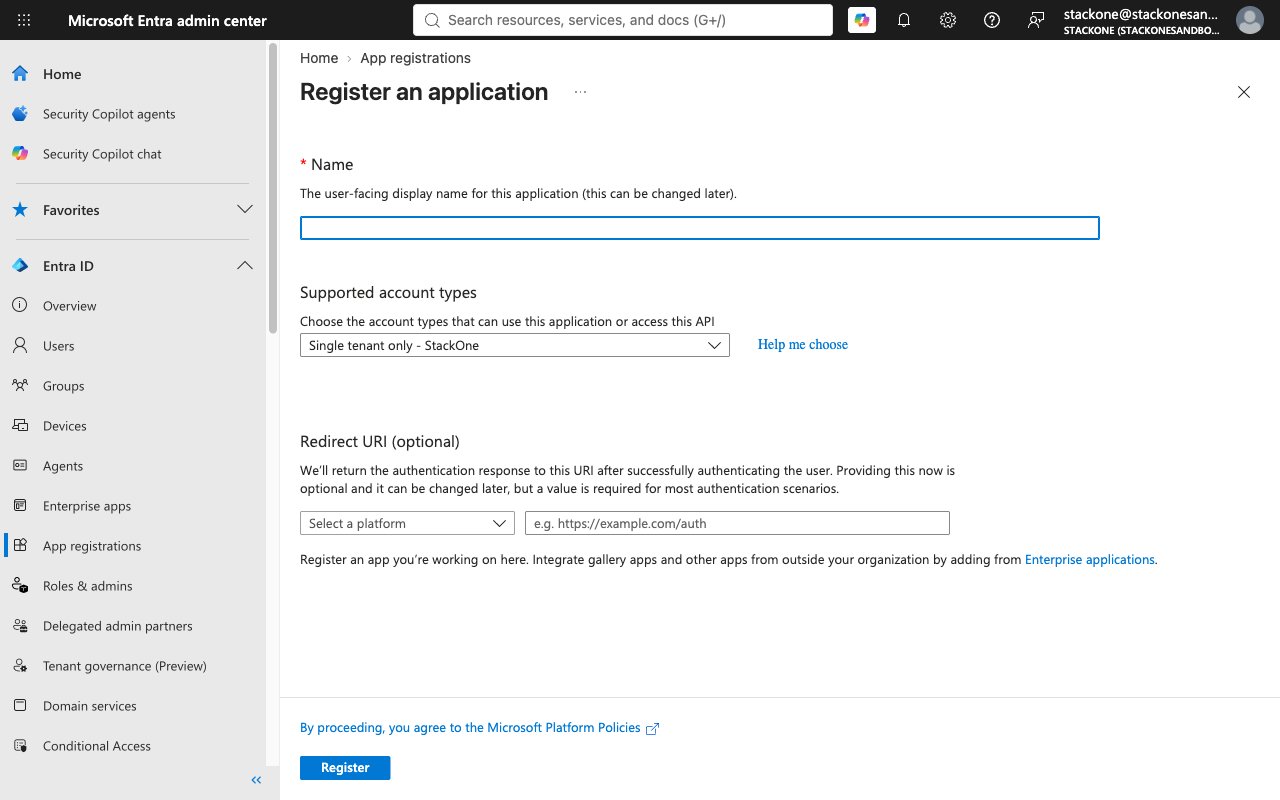
- Enter a meaningful Name for your app (e.g., StackOne Intune Integration).
- Under Supported account types, select Accounts in this organizational directory only for single-tenant access.
- You do not need to configure a Redirect URI for client credentials flow.
- Click Register to create the app registration.
Copy the Application (Client) ID
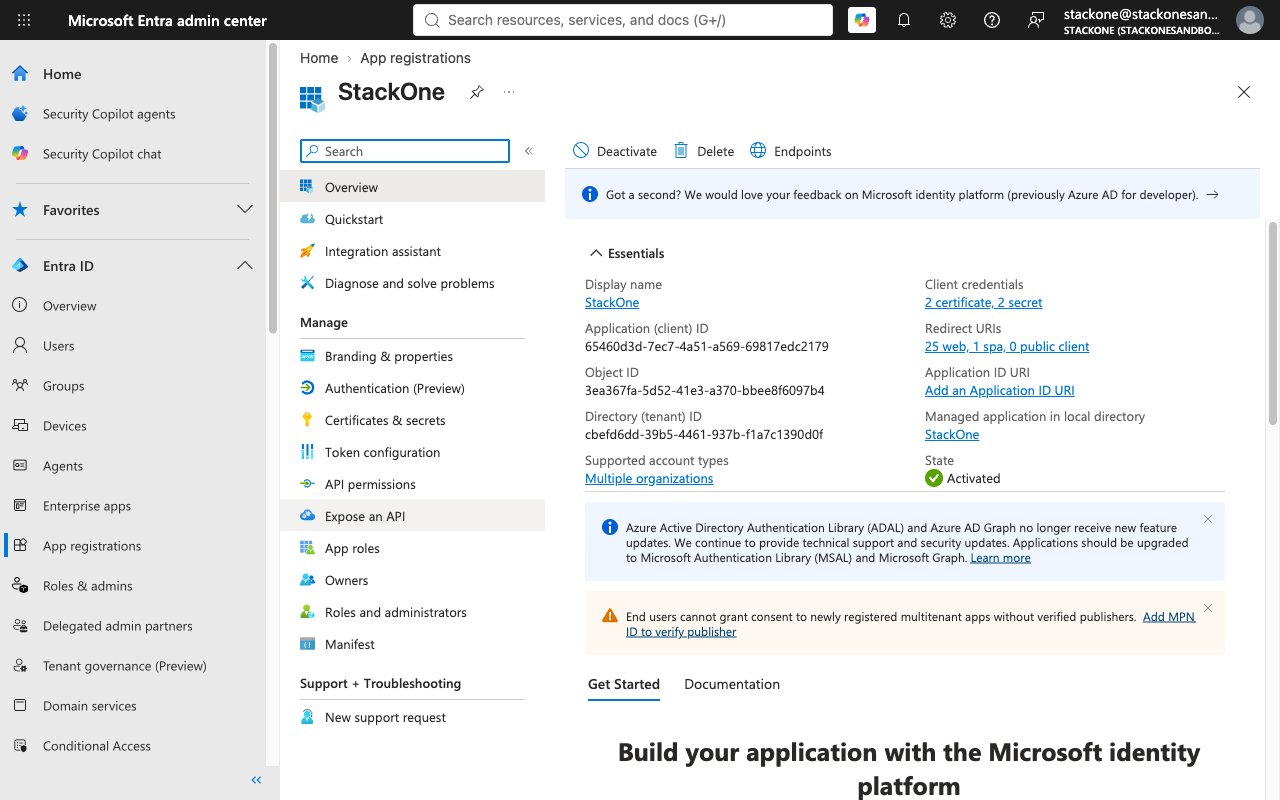
After registration, you will be directed to the application’s Overview page. In the Essentials section, locate Application (client) ID and copy its value. Paste it into the Client ID field when connecting your account.
Copy the Directory (Tenant) ID
From the same Essentials section on the Overview page, locate Directory (tenant) ID and copy its value. Paste it into the Tenant ID field when connecting your account.
Configure Application Permissions
Grant your application the necessary Microsoft Graph API application permissions for Intune device management.
Open API Permissions
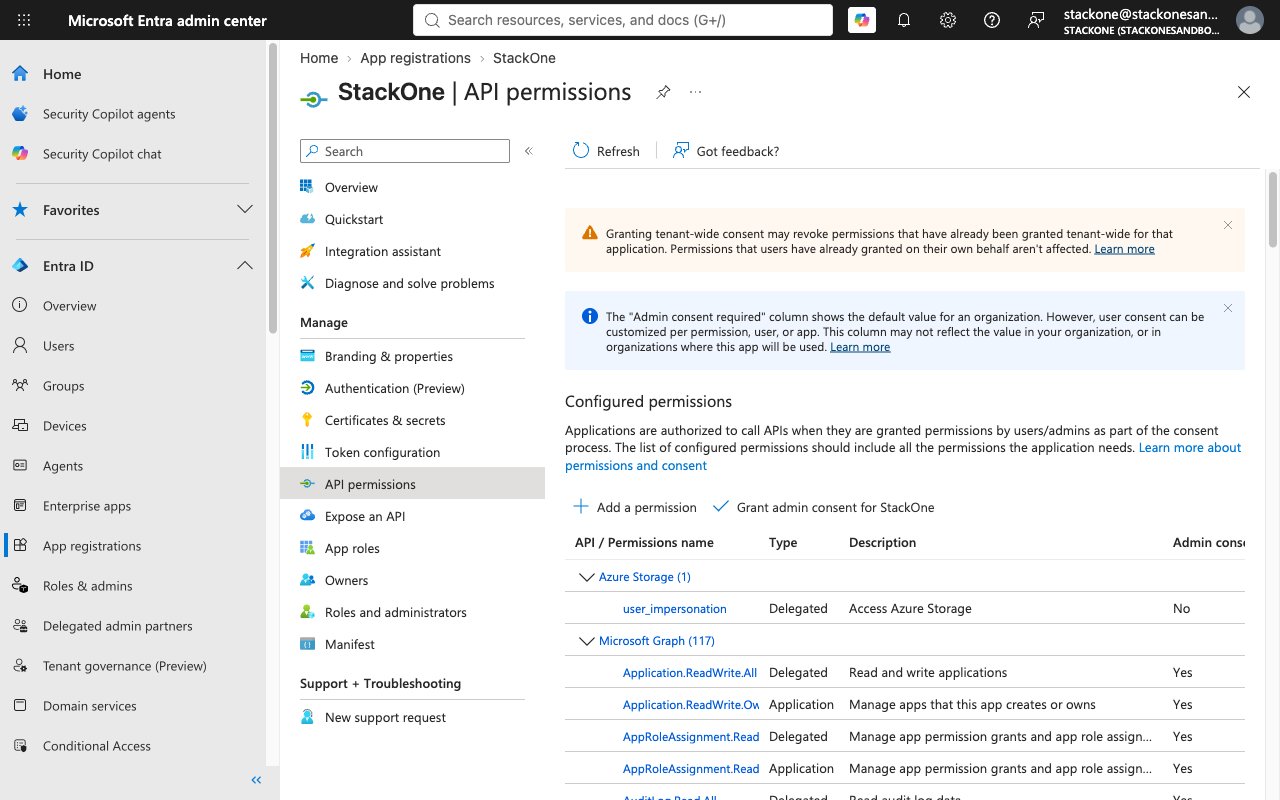
From the left menu under Manage, select API permissions.
Add Microsoft Graph Application Permissions
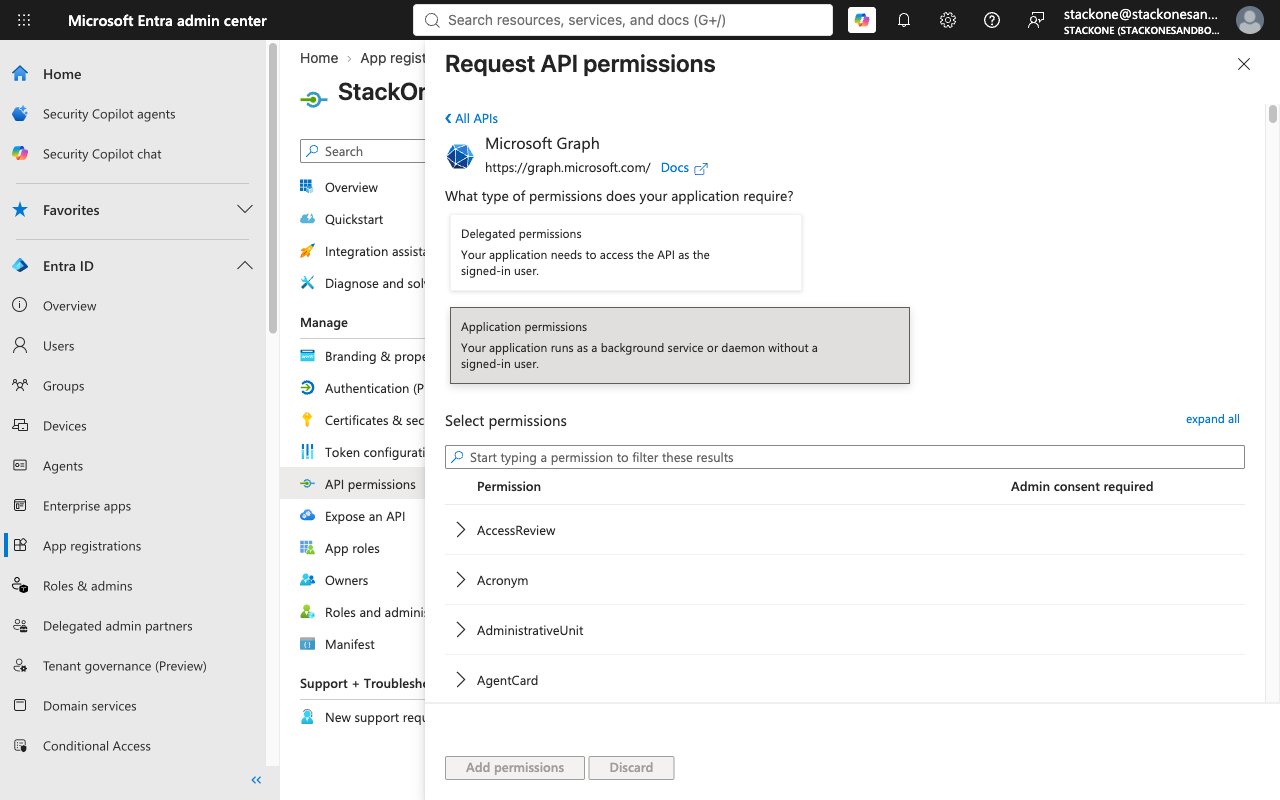
Click Add a permission, then select Microsoft Graph from the commonly used Microsoft APIs. Select Application permissions and search for the Intune-specific scopes required for your use case, then click Add permissions to save.
Choose the minimum scopes needed for your use case. Read-only access requires only the .Read.All scopes. Write access and remote device actions require the .ReadWrite.All and .PrivilegedOperations.All scopes respectively.
Grant Admin Consent
Click Grant admin consent for [tenant name] and select Yes to consent on behalf of the organization. After granting, verify that the Status column shows a green checkmark for each permission. A Global Administrator is required to grant consent for these permissions.
Generate Client Secret
Create a client secret that will be used to authenticate your application.
Navigate to Certificates & Secrets
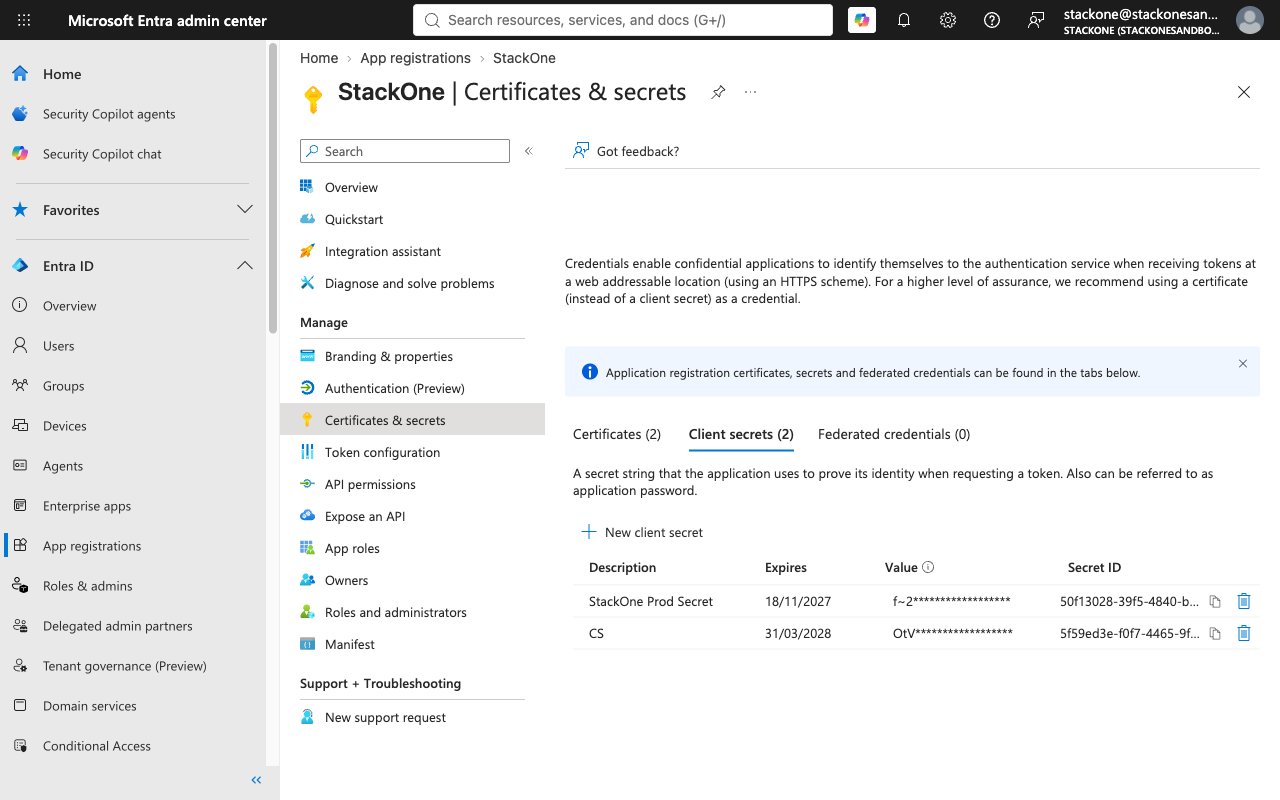
From the left menu under Manage, select Certificates & secrets.
Create a New Client Secret
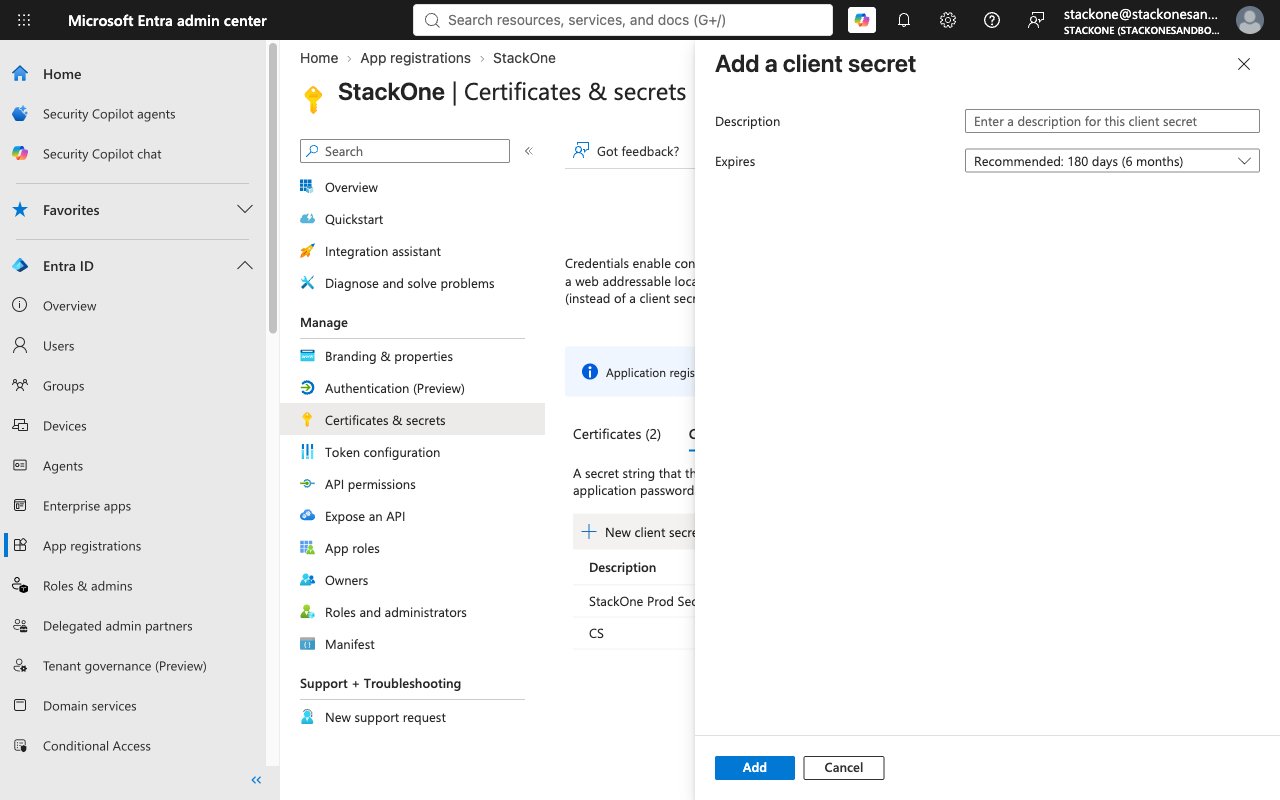
Under the Client secrets tab, click New client secret.
- Add a Description (e.g., StackOne Intune Integration Secret).
- Select an appropriate expiration period from the Expires dropdown.
- Click Add.
Copy the Client Secret Value
Immediately copy the Value of the newly created client secret and store it securely. You will need this when connecting your account. This value is only shown once and cannot be retrieved again.
Linking the Account from the Hub
Navigate to the Hub
Fill out the fields
- Tenant ID
- Client ID
- Client Secret
Connect
- Click Connect
- If applicable, the provider will redirect you to a sign-in or authorization page. Complete the provider’s authorization flow.
- Once authorization is successful, you will see a confirmation popup
If the account linking is successful, you will see the newly linked account in your Accounts page.