

Create a service account
Create an organization-level service account in MongoDB Atlas to obtain OAuth 2.0 client credentials for the Atlas Administration API.
Sign in to MongoDB Atlas
Sign in to your MongoDB Atlas account.
- Select your organization using the Organization selector at the top left.
- In the left sidebar, expand Identity & Access and click Applications.
Open the Service Accounts tab
On the Applications page, select the Service Accounts tab.
- Click Create service account. If you already have service accounts, click Add new in the top-right corner, then select Service Account.
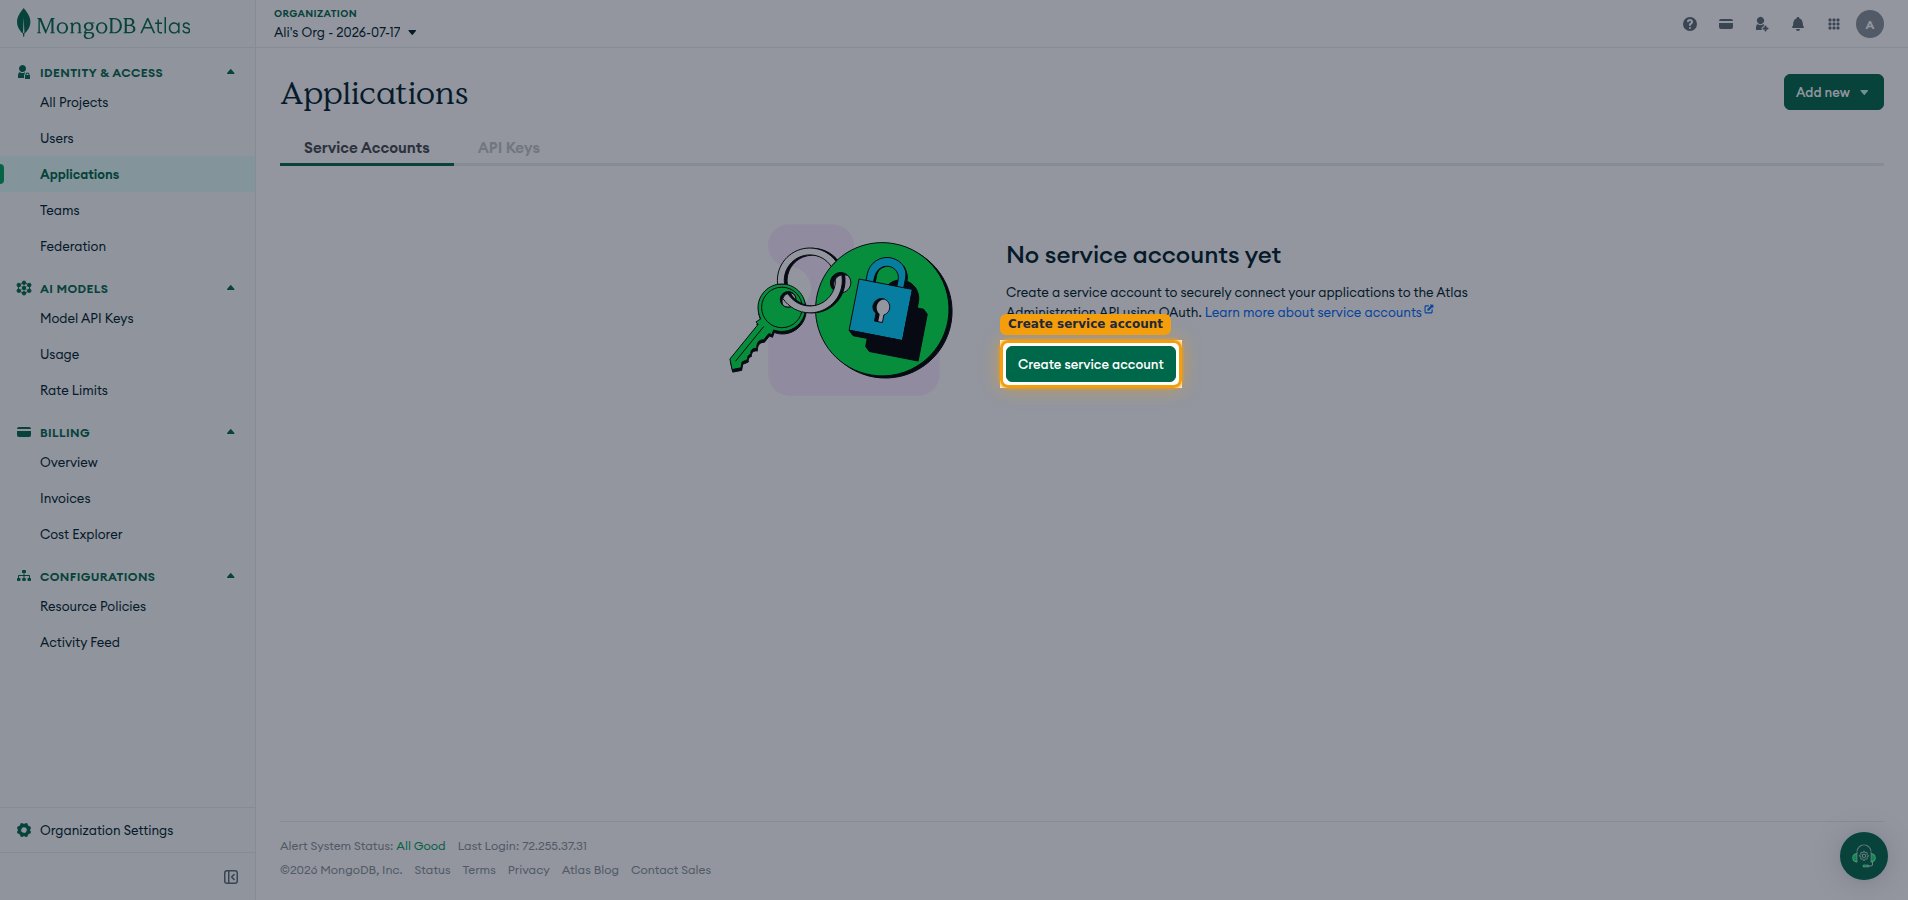
Enter service account information
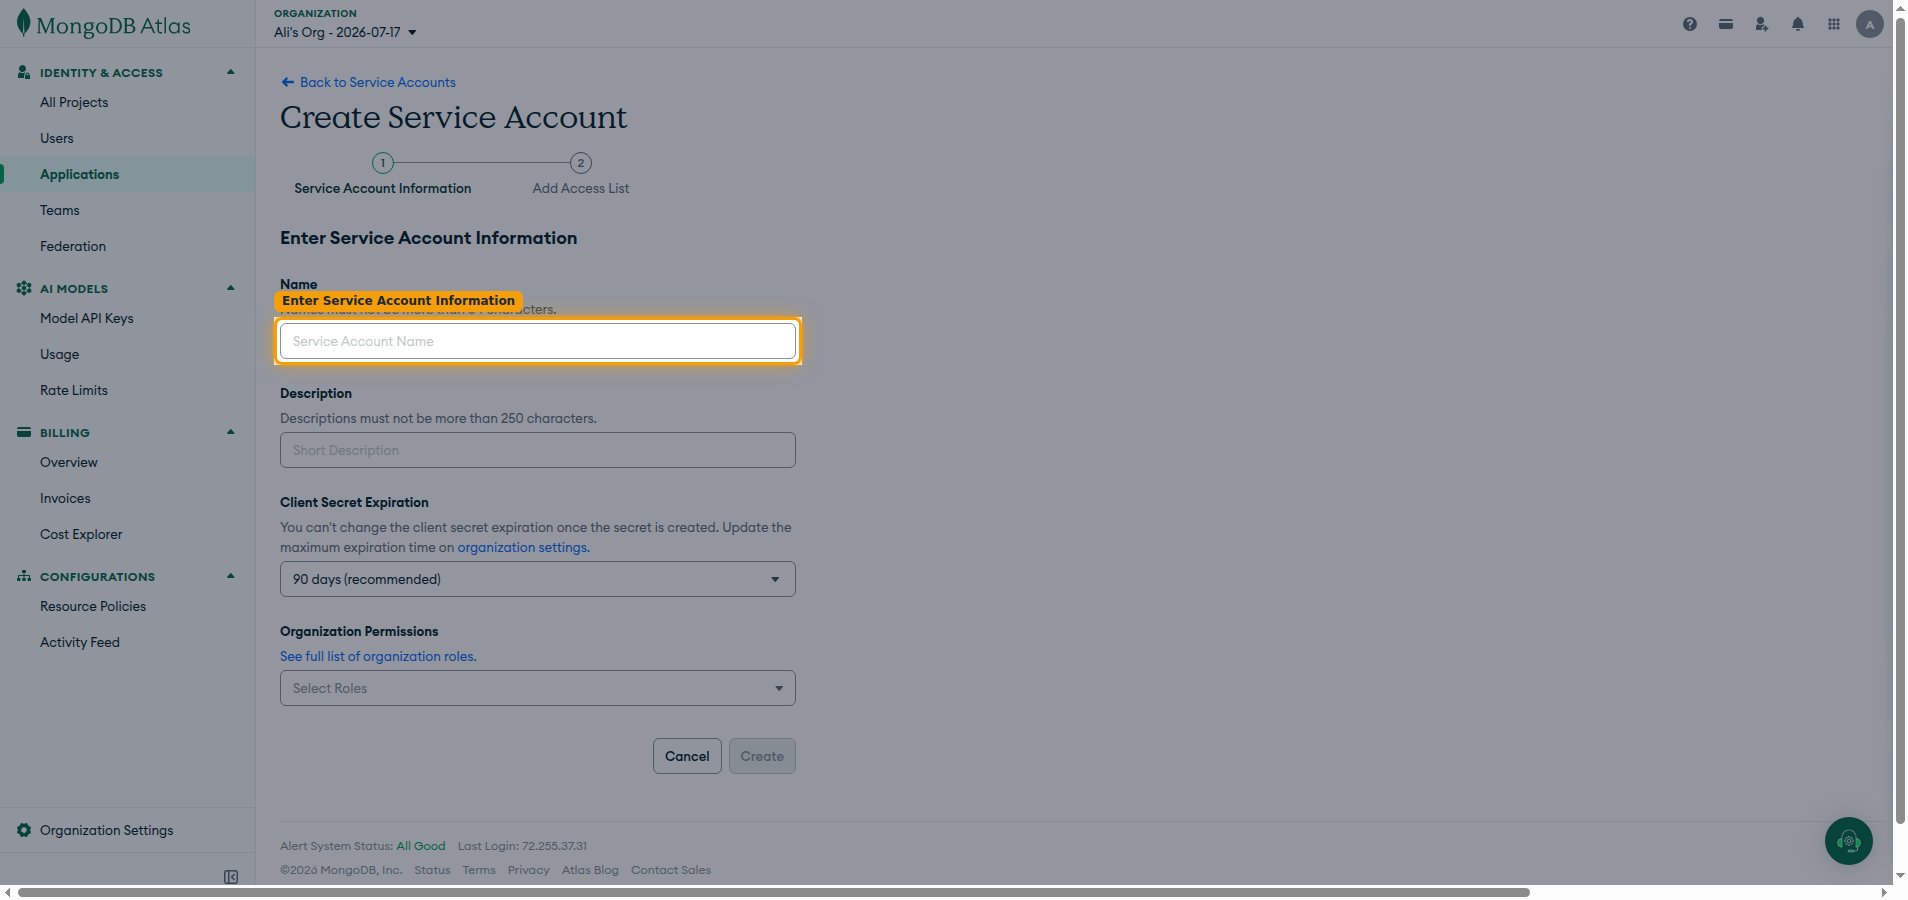
On the Create Service Account screen, under Enter Service Account Information, complete the form.
- Name: enter any descriptive name, e.g. StackOne Integration (must not be more than 64 characters).
- Description: enter a description of the service account — this field is required (must not be more than 250 characters).
- Choose a Client Secret Expiration period (the default is 90 days (recommended)). You can’t change this once the secret is created.
- From Organization Permissions, select Organization Owner. This is the minimum role required for the integration to work: it is the only organization role that can manage teams and organization API keys while also granting write access to projects, clusters, database users, and IP access lists across all projects.
- If you only need read access, Organization Read Only is sufficient, but write operations (creating or updating resources) will not work.
- Click Create.
Copy your credentials
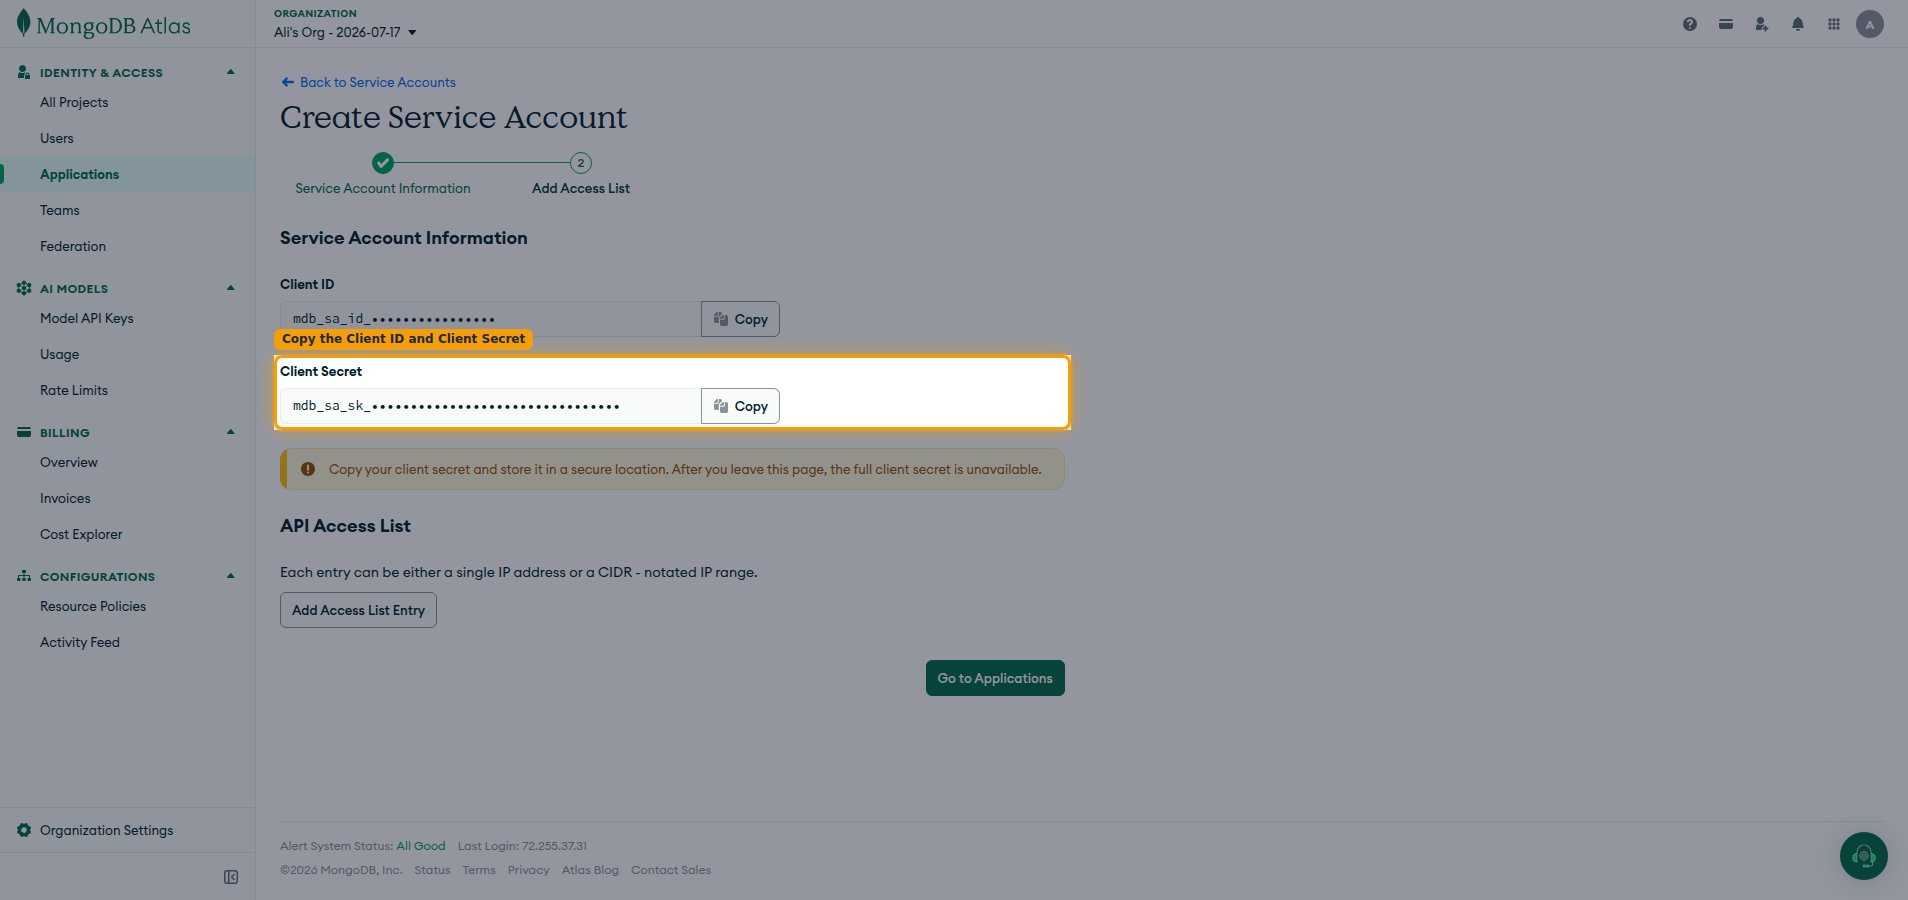
After the service account is created, MongoDB Atlas displays its credentials.
Copy the Client ID and Client Secret
On the Service Account Information screen, copy both values and enter them in StackOne Hub.
- Click Copy next to Client ID and enter it as the Service Account Client ID in StackOne Hub.
- Click Copy next to Client Secret and enter it as the Service Account Client Secret in StackOne Hub.
- The Client Secret is only displayed once and cannot be retrieved later — after you leave this page the full client secret is unavailable, so store it securely.
Linking the Account from the Hub
Navigate to the Hub
Fill out the fields
- Service Account Client ID
- Service Account Client Secret
Connect
- Click Connect
- If applicable, the provider will redirect you to a sign-in or authorization page. Complete the provider’s authorization flow.
- Once authorization is successful, you will see a confirmation popup
If the account linking is successful, you will see the newly linked account in your Accounts page.